Monday, September 10, 2012

Space filler

Hello there! How was your weekend? Mine was great but I got very little done on my project list. A nap, yes. Projects…not much.

Over the years I’ve discovered an answer to one of the biggies when it comes to decorating – filling odd, empty spaces in our home. I’m all for letting a room “breathe” and not putting stuff everywhere, but there are times when a spot just needs something…and I’ve finally figured out a solution that looks pretty and is functional.

If you consider cleaner air functional. ;)

Awhile back I moved a few things around in the living room and knew I wanted something tall and full that would take up some visual space next to the sofa. I took off to our local nursery to see if I could find one of those fiddle leaf ficus trees I’ve seen all over blogland. They are awesome…but I couldn’t find one. And I hear they are not cheap either.

fiddle leaf fig

WOW! Talk about filling some space. ;) I later learned they can be toxic to cats (there is some conflicting info on that), so it’s probably best I didn’t find that one anyway.

Soooo…I happened upon one called a money tree (also known as the jade plant), and LOVED it’s beautiful braided trunk:

plants in baskets

Isn’t that awesome? I did a quick search with my phone to make sure it was non-toxic to cats (check!) and then checked out the price tag -- $35 and it was half off.

Dude. So there:money tree jade plant

I’ve had this one for months now and it’s doing SO well. I used to have it right next to the sofa but then I found that awesome lamp at Lowe’s, so it’s scooched over a tad.

It fills what is an odd space that felt too empty to ignore, but it’s not something like a piece of furniture that overwhelms the space.

I don’t have the greenest of thumbs, but this thing is SO easy to take care of. It needs very little water, and once you find a spot where it likes the light, it’s good to go. This doesn’t get any direct light and it does great.

I found another half off tree that day that I had planned to use behind our family room sofa, but it threw a plant fit in that spot. :) It’s leaves were falling off left and right (the folks at the nursery told me that would happen if it wasn’t happy).

So I moved it over to the bay window in the kitchen and it does MUCH better in full sunlight:

decorating with plants

I didn’t plan on it going there, but I really love it. (No, it doesn’t interfere with the door opening at all. And excuse the Halloween window clings -- we get started up in here.) I’ve realized plants give life to a space like accessories and furniture can’t. (I can’t remember what this one is called, anyone know? It’s got long skinny leaves.)

I try to use different “pots” for each one – they are all planted in regular pots but then I place them in baskets or in this case, an antique crock. They can look a little top heavy otherwise, and I like how this balances them out.

Back when I shared the final office redo, I had a tall fern-type plant next to the chair, and it lasted all of a couple weeks. Sad face. I’ve learned I’m not good with anything even slightly tropical – ferns (which are supposed to be soooooo easy) die on me. Every. time. Maybe my house isn’t warm enough? I don’t know.

That spot was just off without something there, so last weekend I headed back to the nursery and found another money tree and…wait for it…it was half off. Score!:

money tree jade plant

He’s in bad shape so I’m pretty sure that’s why it was half off. I’m nursing him back. :) I put the planter in an old basket I wasn’t using and I love the added texture.

OK, I lied – ALL ferns don’t hate me. I’ve had one on our kitchen sink for more than a year now:

fern in kitchen

This one serves a purpose though – it hides the spot on the beadboard backsplash where I totally screwed up:

No one sees it now. :)

I’m finding plants are really useful when filling dead spaces while decorating the built ins – the fluffiness of this little guy had me right away and it was such a great touch of color and LIFE:

plants in decorating

Wait…I think that one is a fern too. I’ve only had it for a few days, so we’ll see if this one likes me. ;)

Sometimes plants can be a bit of an investment up front, so I’ve purposely gone for ones that were clearanced out so I could see if I could keep them alive. Now I know that money tree works well in our house, (and I don’t kill them) I’m looking for at least one more. Love them!

For years I didn’t use plants in the house because of the cats. I talked about some animal-friendly plants I found in this post last year.

So are you a plant lover? Can you keep them alive? Have you found one that does well (with little work) and care to share? Anyone have the elusive fiddle leaf fig that I wanted in the first place? :)

*P.S. I blogged about what I keep in my purse over at my friend Tauni’s  place…go here to see what’s inside. ;)

Friday, September 7, 2012

New Beginnings

The night before school started, Patrick was getting more and more nervous about 5th grade.  Would it be too hard?  Would he have too much homework?  Would he get success recess? 

As I was tucking him into bed he lamented that he didn't even think any of his friends would be in his class!  Patrick thought about it for a bit, and then solemnly said, "Well, there is this one kid I know . . . but he is a hyperactive psychopath!  With a bad haircut!!!" 

I guess I get an A+ for teaching my kid tolerance.  Not.

I am happy to report Patrick had a wonderful first day!  Several of his friends are in his class and he has a teacher we have known and loved for many years! 


All the little kids are happy to be back in school and have exceptionally gifted teachers. 


Mei Mei was the most excited!  We have decided to age her down and place her in second grade (half time).  I stayed with her the first day, but she kept telling me to go home!  Day two was solo and all smiles.  She tells us over, and over, that she didn't get to go to school in China, and that it wasn't fair!  (Have I mentioned that her English is phenomenal?)  She LOVES school!  Her only complaint is that she wants to go full time, but for now, spending mornings homeschooling to catch her up academically is a better fit. 


Paul and Kim even seem happy to be back with their friends and have structure to their days.


Lizzy is gearing up for a challenging sophomore year in college.  She will be a wonderful nurse!


You might think that with all the kids back in school, I would have plenty of time to do things like clean my house. 

Or blog.

Sorry.

I've been a little bit busy loving on this precious angel.


Being a grammy is such a sweet reward, and I just can't drink her in enough.


She has been called "the peaceful diva" by her Uncle Patrick,


which fits her perfectly.


She smiles frequently,


and is relaxed and calm.


Sweetpea is very, very loved.


And yes, all of these photos were really necessary.  And let me tell you--there's more where those came from!  Oh how we love our new granddaughter!

Just because I like you…

**This giveaway is now closed. The winner was contacted via email.


Hey there! Hope you had a lovely week and an even lovelier weekend planned. We’re about to get slammed with more rain but like always I’m thrilled about that cause I love rainy, dark days, I know…weird. :)

Anyway, I’m in the giving mood this weekend, so I’m offering up a bit ‘o shopping in the form of a $100 True Value gift card to one of you:

Just because I like you. And True Value does too. We really do. ;)

You can go here (click on “participating stores”) to see True Value locations near you.

All you have to do to enter is leave a comment here. Share your latest DIY project, or maybe one you have planned? Or don’t…just say hi, I’m not picky. But please do leave an email address if you don’t have a blogger account I can access. (Spell out “at” and “dot” to avoid any potential spammy stuff.)

Hope you have a great weekend! I’ll be finishing up a few little projects I started this week – can’t wait to show you!

**This giveaway ends Monday, September 10 at noon EST!

Thursday, September 6, 2012

Faux metal (Goodwill makeover)

Hello there! I’m back today with a super easy Goodwill project that almost never happened. ;) Last year I found a cute terrarium for only $5 at Goodwill, but it sat in my storage room all this time because it was just kinda…well, bland.

I love white and bright as much as the next person but this one was just there and not doing much for me:

white terrarium

I wasn’t even going to keep it -- I had it in my car to take to consignment shop a couple weeks ago, but I just couldn't bear to let go of it. It’s hard to find a large decorative piece like this (that has so many possible uses) for so cheap!

So like most of my projects, after a year the answer finally came to me. ;) I wanted to give it a look of a metal terrarium, something like this:

(source)

Mine doesn’t have glass, but that gives you an idea of what was in my head. I grabbed my brushed nickel spray paint and gave it a few coats. It took a few tries to get all of the edges and sides, but I wasn’t worried about great coverage because I was using it more like a primer.

Even though the nickel paint is fairly matte already, I knew it would still be too shiny for the look I was going for, so I pulled out the good old Rub ‘n Buff in Pewter:

rub n buff pewter

This stuff is pretty amazing – a little goes a VERY long way. And they come in a ton of different finishes. (I even tried turquoise on this at first and it was beautiful but not the look I wanted.)

You just put a little on your finger (or you can use a soft cloth) and then rub it on:

how to use rub and buff

Side note -- why do my fingers look so old??

Anyway, just rub it in till you get the look you want. I did most of the sides of this terrarium and barely made a dent in my tube. After it’s dry you can buff it with a cloth, but I didn’t do that on this one.

I couldn’t get a good shot of the difference it makes, but the pewter part is at the top of this pic, the nickel is at the bottom:

It just gave it even more of a matte look, like an older metal piece. Just what I wanted!:

faux metal with rub and buff

There were parts where I didn't rub it in as well on purpose, just to give it some texture and movement.

I feel like it has LIFE to it now:

faux metal terrarium

Eventually I want to get some smaller plants and find a few older looking terra cotta pots to line up inside, but I was trying to use what I had on hand to fill it for now:

faux metal look

I really love how it turned out! Not a bad little makeover for FREE! Well, $5 a year ago…so that counts as free now, right? I say it does.

It took longer to spray paint this thing than it did to add the Rub ‘n Buff. It’s hard to go wrong with this stuff – I love how you can add some depth and interest to ordinary items with it. I’ve used it for years now but never this color – I’m now scoping out the house for something I can use the turquoise color on. ;)

Have you used this paint? I love seeing how people use this stuff -- Carmel over at Our Fifth House uses it often and gives some great how-to tips here.

Tuesday, September 4, 2012

Preacher Advice

Thank you to everyone who commented on my last post.  I am truly touched and humbled.  I wish I could sit down and have coffee with each and every one of you!  After today, we might need to make that an Irish coffee!

I know I said post 1,001 would be about an incredible adoption miracle, but I have no brain cells left to compose anything.  Probably because I spent the day inhaling glue sticks. 

This is what my bed looked like this morning:


And you may be wondering why, on God's green earth, I would choose to use my BED as a TABLE?  It's so I wouldn't be able to procrastinate past bedtime in sorting all those school supplies.  Sorting, and sorting, and SORTING!  (Why did I want 40,000 children???)

It was H - E - Double - Toothpicks! 

I'm telling ya people, you know all those loud TV preachers who rant and rave about hell being fire and brimstones?  If they really want some gnashing and gnarling of teeth, they should just preach that hell will be like a never ending day of sorting school supplies! 

That would straighten some people out!  I know it would put the fear of you-know-who in me!

To add insult to injury, we spent ALL afternoon at the dentist office.  I really know how to throw an end-of-summer party, don't I? 

It all added up to a hellish day and hundreds of dollars.  I am in mourning!  I'm depressed, exhausted and bankrupt.

School starts tomorrow.  Summer is over.  Summer.  My love.  Gone. 

I'm hissing and clawing all the way!  Homework!  Lunches!  And the worst--EARLY MORNING ALARM CLOCKS!!!!

Please send coffee.  And chocolate.  And glue sticks. 

Library built ins update (so close!!)

Hey hey! It’s time for another update on the DIY built ins in the dining room turned library. Last time we talked about this project (it’s been a month!), I explained how we built the bookcases up to this point:

DIY built ins bookcase

The final frontier (well, the biggest one) was to trim out the front of the bookcases, which I figured was going to be the easiest part by far. So Dad came by a few weeks ago, we took some measurements and headed out to Lowe’s to get the trim pieces. But when we go there, we stood in the lumber aisles for a while before realizing our hands were kind of tied.

The vertical and horizontal trim was going to have to be different widths to cover the supports that were already there, and we were walking around realizing that there was nothing with that was the exact size that we needed. Usually I’ll just have the guys at Lowe’s cut stuff down for me (even lots of cuts) but these were going to have to be exactly right to be uniform and cover all the unfinished stuff.

So we kind of aimlessly walked around for a few minutes, racking our brain…and Dad suggested he bring a table saw he has in storage so we could finish it up.

Thing is, neither of us have ever used a table saw. ;) To be honest…and this is going to sound goofy coming from a DIY girl who loves tools…but I don’t really want to use a table saw. They totally freak me out. Not even kidding. I know with time I would become comfortable with it like I have every other tool, but this was not the project to start on.

So I gave the guys who did the basement a call and asked if they could cut down the pieces I needed. Thankfully they could and then they also installed them…WHOO! It is SO nice to have someone else help with a project! Especially one I've worked on forever.

It took me six months to get bases installed and bookcases framed up, and them 24 hours to finish up the trim…can I get a hollaaaa? :)

They went a little above and beyond what I was planning on doing. My plan was to add a thin board (that also had to be cut down with a table saw) to the bottom of the supports for each shelf. They ended up putting one additional support in the middle of each shelf and then supports to the front as well:

I would not have done that and I think it would have been fine, but it does keep that thin plywood from bowing underneath.

They also added some supports at the top where the lights come out of the wall, which we had planned as well. The cords are hidden from below with the plywood:

Now all the unfinished edges are hidden behind trim:

Now do you see why it didn’t have to be perfect? :)

And you can see how under each shelf is finished off here:

Here’s where one of the lights comes through at the top:

header for library light

Much better than how they looked last month!:

I can’t even BELIEVE the difference trim and paint has made! They look like (almost) finished built ins!!:

DIY built ins with bases

I am SO THRILLED. They are coming together just as I had imagined!

There is still so very much to do…lights need to be installed (and purchased!), I’m adding a bit more trim, crown molding to the top, some more caulk, hardware on the cabinets and three more coats of paint to go on the bases.

I had already primed them months ago, but I dropped a can of the back wall color (Storm Cloud by Sherwin Williams) and it went EVERYWHERE. Ever.y.where:

I’m going to prime it over again and then do at least two coats of white paint.

Even though there’s still a ton of work left to do till I finish these, I’ve already started filling the shelves. :) It is SO nice to have our books displayed, I love it! Over the past six months or so, I’ve been gathering accessories and am loving how it’s coming together. I just added these adorable brass birds I found today at Goodwill:

brass birds

It’s been a long process but I’m so thrilled with how it’s turning out! Next time I show you these, they WILL be done. :) It just be a few more weeks cause I’m S.L.O.W.

Did you see my vision from the beginning? Are the lights and all making more sense now? I know it’s hard to see what’s in my head sometimes! My goal is to be done by the end of September…26 days left. ;)

Monday, September 3, 2012

September Before and After Party!

Hello hello! It’s time again! Doesn’t it feel like we just did this three days ago with the August Before and After Party? It does to me. The holidays will be here in a blink…it’s unreal.

It’s time to do it again peeps, and like always I want to share just a few of the projects that caught my eye from last month. I’m blown away, yet again. You all inspire the socks off of me!

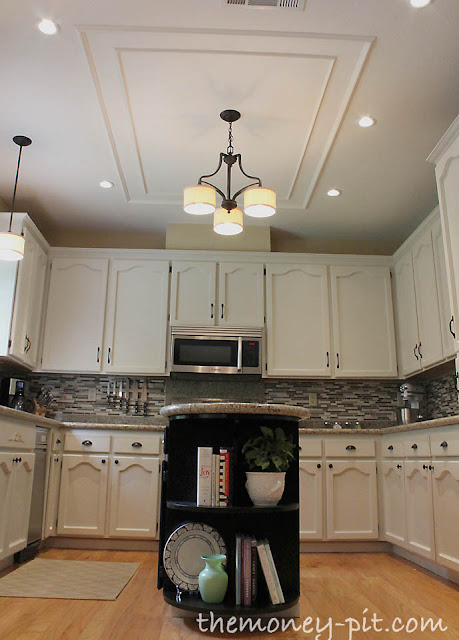
First up, you have to check out Kim’s kitchen redo:

oak to white cabinet redo

I really love what she did on the ceiling! It’s a huge transformation and she did every single bit of it herself – even electrical! And you’ll never guess where she got her backsplash tile (I didn’t even know they sold tile).

I loved this simple update Mary made to regular lamp shades:

pottery barn inspired lamp shade

She was inspired by Pottery Barn and I like her version even better. ;)
I couldn’t resist sharing another kitchen redo, just because I loved Jessica’s butcher block and beadboard island so:

beadboard wall kitchen open shelves

Check out all the details here!

Cassie painted over her orangish walls and wow, what a difference it made!:

zebra rug

I’m familiar with the orange walls…and painting over them. ;) I really love all the color in Cassie’s home. Lovely.

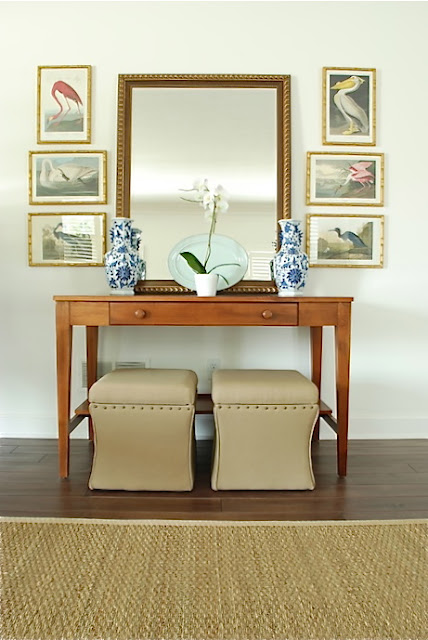
Hold on to your seats people…I was oohing and ahhing over each picture of Carolyn’s living room redo:

white walls decor

Gah!! Can you even believe how beautiful?

OK, I couldn’t resist one more pic:

seagrass rug

Do you blame me?? Hahllooooo House Beautiful, are you seeing this?

I think Amanda’s “faux” butcher block idea is brilliant:

faux butcher block

Go here to see how they did it – if you’re handy I bet you could do this too!

And finally, I couldn’t believe how amazing Paula’s tile looked after refreshing her grout:

how to whiten grout

It seems like a fairly simple process – she shows you how it’s done here.

Awesome huh? I love seeing all of your talent every month! As always, if you’d like to pin these projects and spaces, please to go the respective sites to do so, to insure they get credit for their efforts.

If you’d like to be considered for a highlight in next month’s recap, be sure to add this cutie button to your post:

<div align="center"><a href="http://www.thriftydecorchick.blogspot.com/" title="TDC Before and After" target="_blank"><img src="http://www.homestoriesatoz.com/wp-content/uploads/2012/03/beforeAndAfterButton_thumb1.gif" alt="TDC Before and After" style="border:none;" /></a></div>


Hope you’re having a lovely Labor Day! Link it up!: