Showing posts with label awful. Show all posts

Monday, October 28, 2013

What you don’t see

Hey hey! I finally finished up taking down and putting away all of the Christmas decor yesterday and it feels soooo good to get it out! I love it, you know I do, but come the new year it needs to be gone.

There is still the outdoor decor, but it’s dang cold out and we have a thick layer of snow, so who knows when that will happen.

As I was gathering up the Christmas over the past few days I noticed a few glaring things in our house that I thought I would share. It’s a new year and throughout this next year I hope to continue to show you the fun, pretty stuff in our home. But if you’ve been around for awhile you know I don’t shy away from showing the not so pretty sometimes too.

We are a real family and live in a real house and that means real messes and real things that go wrong… and in the land of blogs sometimes it’s hard to remember that the perfectly styled pics are just that – perfectly styled. ;)

Here’s the low down on just a few of the things that need to be fixed around here…

I think it was three years ago that we thought we had a leak in an upstairs bathroom – we thought so because this happened to the family room ceiling:

Turns out it wasn’t a leak, the protective little jobby I had on the tub faucet (when the Bub was little) had been turned upside down, so when the water came out of the faucet it was flowing right back up into the wall.

It was just one time but it did some decent damage to the ceiling. We have to have the tape removed, retape the drywall and then have the ceiling retextured. It gives me a headache just thinking about it, so it’s sat there. Hung there?

Speaking of that ceiling, it’s getting a paint job asap – the color is driving me NUTTY. And so are all the tiny holes and non-caulked joints on all of the crown in that space:

crown molding corners

I put up the crown a year or two ago and if you’ve done crown molding, you know it can be a royal pain in the patoot. Getting back up on the ladder to fill those holes, caulk the joints and paint it all has been at the bottom of a verrrry long list.

And yes, you can totally tell it when you look at it. This still does not light a fire under me. :)

The drapes in our family room have been unlined with a rough edge since I hung them up years ago. It’s just fabric clipped up:

I’ve now convinced myself that I like it that way. It adds texture…so I say. ;)

Remember that Pottery Barn rug that I saved for and waited patiently for it to go on sale before I brought it home and LOVED it?:

pottery barn jute rug

Well the dog loved it too:

You can’t tell how big it is there but that is a HUGE hole in my pretty rug. I just keep stuffing the loose ends back into the hole to try to hide it. Of course an open, glass coffee table does nothing to help disguise it, but whatever, I am keeping this rug. :)

Our master bath is a room that’s gotten very little updating – I painted soon after we moved in and threw a frame up around the mirror:
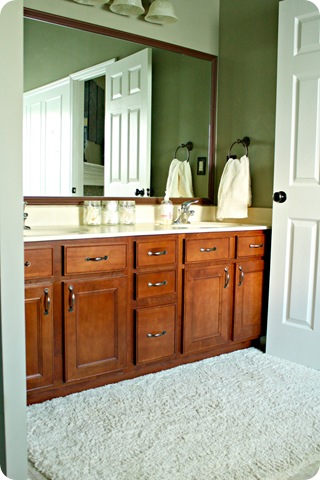
maple bathroom cabinets

But it’s almost nine years are starting to show – both of our sinks leak unless we put the handle in just the perfect position, and both of our stoppers are broken:

The leak and stopper happened in one sink, and within two weeks it happened to the other. My plan has always been to replace the faucets entirely, so it will wait till then.

Our tub looked decent a few months ago:

beadboard tub surround

Well, we thought we had a leak (again) but it wasn’t a leak (again) – but we didn’t find that out till the plumber took the side of the tub off just to find nothing was wrong:

beadboard tub surround

I installed the beadboard so that the panels could still be taken off, and it worked great, but I now I need to reinstall the trim and paint over all the new caulk.

And remember when I did all that tile around the tub years ago?

Well, someone (me) never caulked around the bottom of said tile and water got splashed up under it one day and leaked down into the laundry room walls and made a new mess:

IMG_4312

I was thrilled that day when I saw the drywall bubbling up, let me tell you. Good things: the leak we thought was a leak wasn’t a leak, I just need to caulk the tile (!!!), and there’s no damage to the electrical stuff because of the water. Bad news: I have drywall repairs and lots of painting to do.

Did I mention this all happened months ago? Yeahhhh.

Speaking of the laundry room, I still don’t have the beadboard painted or the baseboards down:

black beadboard

It’s been like this since I installed those peel and stick tiles a year ago. I wanted to wait till the washer and dryer were moved out to start this redo and I need to figure out a plan for the new mud room built ins before I can finish up the beadboard. So…it sits. Without baseboards.

And finally, the doozy. This one may make you shed a tear, it almost did me. Remember our beautiful pergola on the deck?:

sears gazebo night

Sigh.

After some nasty, fierce winds and a couple snow storms it now looks like this:

Yeah, I took that through the window, remember it’s cold out there!

And yeah, it’s AWFUL. Sucks, royally. It didn’t do any damage to the deck, thankfully. This just happened recently and every time we get ready to go take it apart, it snows six more inches or the temps drop down under 30 degrees, so we haven’t been able to clean it up yet. It made it through plenty of winds and snow last winter and spring, it was just too intense this time I guess.

It makes me just sick to look at it. I don’t know what we’ll do to replace it this year…time will tell.

So anyway, there’s a look at the not-so-good around our house. It’s not stuff I actively hide by the way, I don’t edit my photos or anything like that – if you look hard enough you’ll see a lot of it. ;)

And no, I’m not complaining. This is part of owning a home and I’m thankful for it. Every once and awhile I just like to show that our house is far from pretty all of the time.

Be kind to me…I did accomplish all of this and more last year! ;)

Saturday, August 17, 2013

Planking (a wall, not me)

How to plank a wall

First of all, can I just say that the groundhog is a liar? Not cool Punxsutawney, not cool.

Anyway, I’m sharing some more progress in the powder room today. As you know, it’s sat in a half way done state for years now. Half painted walls, half wood-planked walls and drywall with holes, bumps and chunks everywhere.

Not pretty. A couple weeks ago I shared a little bit of progress with the floors. That was the part someone else did – aka, the easy part. I started the wall treatment last summer (yes, nine months ago) and then stalled out.

Now that we’ve gone without a toilet on our main floor for a month, I figured it was time to get my butt in gear. Maybe?

I needed to get two walls planked and painted before the toilet could go back in:

covering drywall damage

The upside down trash can is where the toilet goes, in case you couldn’t tell. ;)

There’s no installing all of this with the toilet in, so the walls had to go up first.

So here’s the thing – this is a big job. Not hard, and the installation is pretty fast, it’s the painting that takes eons. And that’s precisely why I haven’t gotten moving on this past a one small wall in the past year.

My plan for years now has been to cover up most of the walls. Two reasons for that – my mistake early on in my DIY life of using glue to install molding to the wall:

covering drywall damage

I think I’ve mentioned this before – but never, ever EVER use glue (and I used Liquid Glue, yay!) unless you are SURE the trim is staying there forever. And ever. Did I mention forever?

If you ever think you’ll want to take it down, just use nails. Glue will either forever be on your wall or will take chunks out of your drywall when you remove the trim. (I had to have the drywall in the dining/library remudded because of this.)

I also had tried this fun texture technique on the wall years ago and when I went to take it off it never went away completely:

covering drywall damage

I didn’t sand hard core or anything -- it may have come off with a little more work. But I needed to hide it.

So anyhoo, I knew I needed to cover up the walls so I decided to use these planks:

wood planks

You can get them at Home Depot or Lowe’s – they are similar to the beadboard planks (like on my island) but without the bead. They are really thin, which I wanted, and cheap ($9 for six eight foot boards). They are really so easy to install – the tongue and groove makes it like a really simple puzzle – you just slide one into the other.

Because I wasn’t using glue I marked where the studs were in the wall with my FrogTape:

keeping track of studs with painters tape

This way I could get a good grip with each nail (I used my nail gun and you’ll really want to have one for this project, unless you use glue. But don’t.)

The only other tools you’ll need are a level – uhhh, to keep things level:

DIY wood planked wall

I check every piece for level as I move up the wall. Most of the time they’ll start to get wonky and you’ll have to make small adjustments.

I also like to use a rubber mallet:

rubber mallet

You’ll want this to get the tongue and groove together – sometimes they don’t want to go and need a little tap.

I just moved my FrogTape up the wall as I worked:

DIY wood planked wall studs

Most walls are pretty straight forward – just stack and stack and stack.

I had to deal with plumbing on one wall, and at first I was going to use a jigsaw to cut out spots for all of it, but then I realized I wasn’t putting the pedestal sink back so I could just go around it:

covering drywall damageDIY wood planked wall 

I didn’t even paint all the boards back there. NO ONE will see it when the vanity is in. Perfectionist I am not.

You can also see how the sink was stuck to the wall and did damage when they took it out. The more I work on our house the more impressed I am with our builder – I mean seriously, stuff isn’t going anywhere. I’d have every baseboard in the house replaced if they weren’t IMPOSSIBLE to remove. It’s insane.

Anyway -- the boards covered that spot right up!

I gave it all a coat of Kilz oil-based primer:

 kilz primer

It’s stinky but oil-based it supposed to hide the knots in the pine much better long term and won’t yellow over time.

After a coat (I was going to do two but seriously, it’s stinky and it covered great wih one coat) I did a quick sanding to knock down the brush strokes. I tried to get my assistant to take a pic but this is what you get:

DIY wood planked wall

This is why photos of me don’t happen here on the blog. :)

So here’s the thing – I don’t caulk or putty holes till I do at least one coat of paint (and a sanding if I’m doing that). First of all, paint will fill in a TON of sins. And the dust from the sanding will fill in a lot of nail holes for you.

The holes that were left were filled:

DIY wood planked wall

I also filled imperfections in the wood too.

There parts where I had to install pieces a little higher (so they didn’t fit all the way into the one below) so they would match up to the wall next to them. You’d think they'd all be the exact same height but they’re not. You have to make some adjustments.

The great part is, when you fill it in and paint you’ll never notice. I caulked the space between these two:

DIY wood planked wall

And with two coats of semi gloss over it you can never tell it’s not snug up against the one below it.

I used a roller and brush for the semi gloss white – fill in the grooves with a brush first, then roll over it:

DIY wood planked wall

I finished up the two walls at midnight last night, planning on the toilet being reinstalled first thing this morning. But now it’s pushed back to later this afternoon. Of course. :)

I’m just thrilled that we’ll have our toilet back in here after a month!

It still looks rough, I know. Every wall will be trimmed out with a board and batten technique. So I didn’t fill the holes, paint or worry about any imperfections on the edges/corners of the planked walls.

Two walls down, one to paint, and three to plank and paint! Then the vanity will get installed, boards/baseboards will go up, the top will get trimmed out with a ledge, the light changed out and new paint color on the walls (a long story).

Now I’m so excited to get this done – I just needed to get things moving and now I’m psyched to get it finished. Longest redo in the history of my house, for sure.

These planks are what I used on our stair landing and the wall down to the basement as well:

wood floor stair landing stained wood wall

I’ve seen a few ways of doing this wood wall treatment and I just like to use this stuff because it’s so easy to install and I don’t have to have anything cut down. I do have to say, the wood this time was just AWFUL as far as quality was concerned. Full of holes and knots and every other board was just a mess. I’ve never seen them so crappy. I am still using every bit I can because I have walls and sections that are smaller so I can cut down the good parts out of the wood. I didn’t have this problem at all with either one of the projects above.

So have you planked a wall? How did you do it? If you have damage on your walls it’s a great solution!

P.S. I have had to turn off anonymous comments again, I apologize! There are just too many spammy comments getting through all the sudden. You can still sign in under blogger, wordpress or typepad to comment. I’ve also enabled the reply function (it had a bug in it for a while but it looks to be fixed), so if you ask a question I can reply to you here!

P.P.S. If you haven’t checked out all the amazing projects over at Creating with the Stars you need to!:

My partner Sarah over at While They Snooze got second place last week, I’m so excited for her!! Go vote for her again, OK?? I just can’t tell you which one is hers yet. ;)

Wednesday, November 16, 2011

How to install peel and stick tile

Hello all! Hope your week is going SWELL. ;) I figured it was high time I finally gave the toot on how I installed the peel and stick tile in the laundry room.

First of all, let me say…I LOVE THIS STUFF!!

It’s rockin’ my world. I’m SO pleased with it.

And now I’m going to tell you how totally easy it was to install. It’s just silly really.

The peel and stick we used was the Novalis tile from Lowe’s:

Novalis peel and stick

You can find it online here. It’s $2 and change for each 18 by 18 tile – so I covered the whole floor in our laundry room for less than $60.

First up I had to figure out how I wanted the pattern to go. I played around with it for awhile, just laying the tiles out to see how they would look. I didn’t want to to a standard pattern with straight lines for a couple reasons – one I wanted it to have more movement to it, and two, I didn’t want to have straight lines I could mess up. ;)

I ended up with a version of a brick pattern – because the room isn’t very wide, I changed it up a bit. I stacked each one off to the side of the other, measuring three inches to the side each time.

You can see how they ended up here:

Does that make sense? I hope!

When I needed to cut a piece, I measured the size I needed, then used a level to make the straight line:

I read that you should use a razor to score and cut the tiles, but I used what I had on hand and it was WAY easier:

My trusty Open It scissors:

image

I use this thing all. the. time. LOVE it. It cut the tile like buttah. :)

I found them much easier to use than trying to cut straight and deep enough with a razor blade.

Each tile has a subtle flow to the design, so you’ll want to use the arrows on the back to keep the tiles consistent:

It’s so subtle I doubt you’d be able to tell if they went the wrong way, but I stuck with it just in case.

This stuff is CRAZY sticky. I know…duh. But really, it’s crazy. :)

I would peel the backing off in big pieces, then use little bits of the backing to grab the edges:

That way I could hold on to it without gluing my fingers together compromising the sticky.

I did mess up my pattern once and freaked out a bit -- but it came up fine with some muscle. (I had just laid it down a few minutes before so I think that helped.)

The directions say to use a weighted roller over the installed tiles, or if you don’t have one, to use a rolling pin. I used a rolling pin over half of it and quickly realized the pin was leaving burnish-type marks all over the tile. It’s not a big deal cause no one would notice it but me, but for the rest I just used my hands and walked on it, focusing on the edges. I figured my weight would be sufficient. ;)

Overall the tiles went together flush and you couldn’t see between them, but in a few spots you could see the plywood floor:

Those few spots drove me batty. :) So I went back to Lowe’s and got the grout (it’s grout just for this vinyl tile). I started schmearing between the tiles and then noticed it wasn’t going well.

The grout is almost too wet – so it didn’t lay in the grout lines well after I wiped it all down with a sponge. The grout would stay in some places and completely come up in others. It looked AWFUL.

I wiped it all out from between the tiles, about to give up on it, and then realized there was a teeny bit left between the tiles that looked great after it dried:

grouting peel and stick vinyl tile

So I just started smooshing (like my technical terms?) the grout into the grooves with my finger. Then I used a rag to wipe it out, leaving the little bit at the bottom.

The pics above are the same spot before, during and after the grout. It finished it off beautifully!

Like I said, it’s holding up GREAT! A few weeks ago our humidifier in our HVAC system leaked everywhere (leaving lots of lovely water standing in the basement – yes, water is out to get us this year). The water got past the utility closet threshold to this flooring and as far as I can tell, it’s held up great. No buckling, no warping, nothing. I’m hoping the grout kept the water from getting underneath the tiles.

Best part is, if I do need to pull up one tile to replace it, I can. That is what I’m talkin’ about!

So there you go! Hope this all makes sense to those of you who are hoping to try this on your own! Lowe’s has a great selection of colors and designs, and the tiles come in 12 by 12 or this 18 by 18 size.

I love how real they look and how easy they are to clean!:

Now I just need to tackle every other surface in this room – after items 1-150 are completed on my list. ;)