Hello all! I hope your holiday was just wonderful!! Ours was great, I am counting my blessings. I’m slowly starting to function after feeling like a sloth for the past couple of days. I started a bit of decluttering last night and my Dad and I took the Bub out sledding this morning which was a BLAST. I can’t remember the last time I did that. :)
Today’s post is up late today because I’m still on Christmas break mode – and will be for the next week or so. I have both the hubs and the kiddo home and am loving it.
I love doing a year-end recap every year to look back on the bigger projects I’ve completed. When I look around our house that is a total and complete pit as I type right now, it makes me feel better. ;)
I rounded up the top ten, or twelve? projects of the year, based on comments, to share today. The first was my office redo, which started out like this years ago:

It was warm and cozy but not my style anymore. It took about a year (if you’ve been around for awhile the time it took will not surprise you) to complete the redo.
It consisted of a new wall board and batten treatment, new paint, craigslist furniture, Goodwill art and we ended up with new floors last fall too, which I LOVE. It took forever, but I ended up with a space that I just adore:


It is a pleasure to get to work in there every day, writing to you. :)
Our pantry got a redo this year too, thanks to melamine boards that replaced the no good, horrible, awful wire shelves:

It has stayed pretty organized too, far better than any other time I’ve cleaned it out and reorganized it. Which has been quite a few times. :)
I found some funky moon chairs for the basement and gave them a inexpensive, quick makeover:

And yes, they SPIN. The very best part!
Over the summer we had a HUGE job done that was a long time coming. We had the walls throughout our open floor plan painted for the first time in eight years. It was flat paint that desperately needed it. Oh yeah, and those flat walls were PINK:


That’s the after on the right by the way, which should be obvious due to the lack of pink. :)
Part of the basement finishing process included a laundry room – I explained my reasoning in this post:
 Some thought I had lost my marbles wanting to move the laundry downstairs, but I had a plan…a plan that luckily came together. It involved this big fat tube – our laundry chute!:

It pretty much rocks. my. world. Oh yeah it does. We still haven’t had anything stuck in there either, it works great.
You can see the latest on the new basement laundry room here:

It’s coming together, slow but sure.
I completed a few projects in the family room this year – first up was my Pottery Barn knock-off art:

And then the painted Goodwill coffee table, which I love SO much more in it’s brighter state:

I had BIG plans for the kitchen this year that never happened, but I’m determined to make progress in 2013. I did finish up (yet another) island redo:
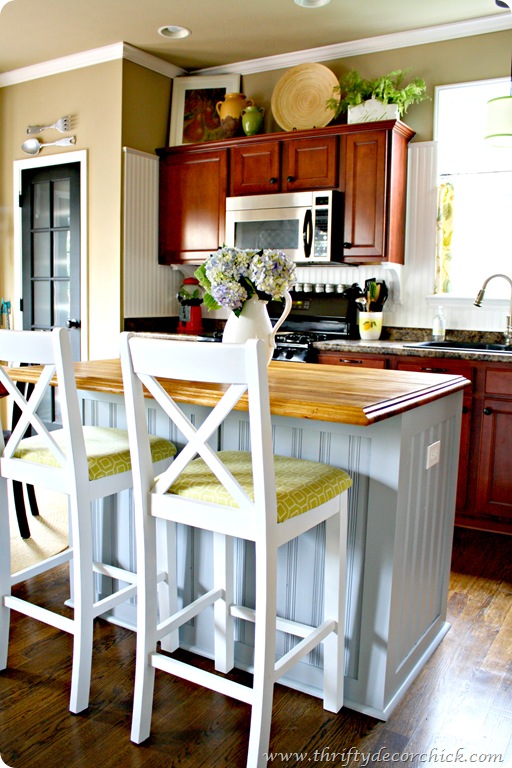
I think this was makeover number five? ;)
One of the biggest projects I completed this year, probably ever in our house was the built ins in our dining room turned library:

My Dad and I built them using kitchen cabinets as the bases and I am SO thrilled with how they came out.
I started out this year asking you all if I was crazy for thinking about losing the dining room and your responses here encouraged me to just do it! It almost took all year but I am so glad we went ahead with this project!
Of course, the biggest redo in our home this year was finishing the basement, which we hired out for (for the most part – I did the painting of the 800+ square feet and all of the baseboards). Even then it still took about six months to finish, just because we did chunks at a time. We still have to finish up the bathroom, the kitchenette and the laundry room is almost there. You can see more of the basement progress and projects here.
One of my favorite projects this year was one leading down to the basement – I love how the wood wall turned out:
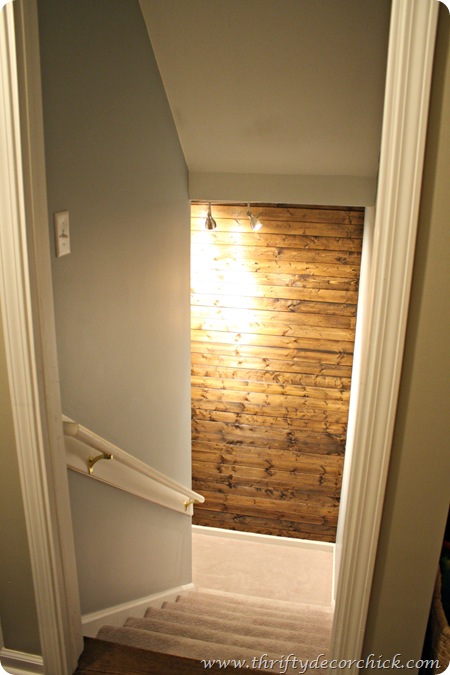
We get compliments on it all the time – I am thrilled with the warmth and texture it gives what would otherwise be a boring stairwell.
Wow! I feel productive all the sudden, which is nice cause I’ve felt like a total slug the past few days. ;)
I love working on our home and love seeing it evolve over the years – it is one of my greatest joys to do what I do!!
Of course I cannot WAIT to get started on 2013!! We may not have Twinkies or Snoballs (sniff) but we will have some DIY! I have sooo many projects planned for the basement, and I really hope to make my plans for the kitchen happen as well. And then there’s the never-ending powder room and guest room that have sat half done for two years (more?). But first, I must declutter and get all of this extra STUFF out of my house!
I LOVE this time of year, don’t you? A fresh new start for everything.


