Hello there! Sorry about the later post today – my computer and I had it out for a good hour and a half this morning…but I won. So far. I need to be nice so I can finish this post. ;)
So earlier this year I showed you how I added some family photos to a small wall in our family room:
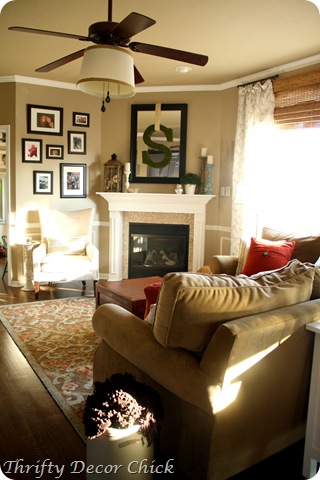
That little wall is kind of awkward and it was hard to figure out what to put on there – it’s not big, but big enough that it needed something substantial. I couldn’t do a mirror because of the mirror on the mantel. So I ended up with a collage of family photos.
I loved having them up there, but there was something about it that drove me a little batty every time I walked by – it just seemed too busy. There was a lot going on on that side of the room.
So for months I’ve been trying to come up with something to put on that wall. I couldn't think of a THING for the longest time. The frames stayed till a couple weeks ago when I had had it and took them down. But the blank wall was almost as annoying for me as the frames…so I got started on an idea that had been growing in the noggin for awhile.
I was inspired by these rustic wood art pieces at Pottery Barn:


The one on the left is 50 inches square and costs $400 – yowza. I liked it but putting it together looked like I’d have to actually use some math, so I decided against that one.
I liked the one on the right even more anyway, and it looked wayyy easier to copy. I had some scrap luan plywood in the garage, and the width was perfect – I just cut the length down to about 36 inches with my jigsaw:

Then I grabbed some scrap pieces of lattice wood and started laying it out:

This wood is pretty cheap and I use it quite often, so I had a decent amount of leftover pieces. I just laid out them out, figuring out what needed to be cut down as I went:

It was like a puzzle and actually quite enjoyable to figure it all out. I did need to go buy a few more of the lattice pieces to finish it up, and I cut those down in random sizes too.
I went ahead and nailed it all on the board when I was done laying it out, and like ALWAYS, saved my painting till after it was put together. I know some of you think I’m crazy for doing that, but it’s just one of my things…I need to see it together and get that accomplished before I paint.
And I wasn’t even sure what paint colors I wanted to use – I figured that out after it was nailed together. It wasn’t a big deal to paint afterwards, I just used my Frogtape to tape off each one:

I was able to reuse the tape over and over. If I had painted beforehand I would have had to wait for each piece to dry before installing – so the time I took to tape off was the same that I would have had to wait for the paint to dry. At least that’s what I tell myself. ;)
I wanted to use paint I already had, so I used a red color, a grey blue that I used on the back of the dining room built ins called Storm Cloud, the color we had painted in our living room and stairway, called Analytical Gray, and I was trying to figure out a fourth color to use as well.
I dug through the paint stash in the basement and found the wall color for the family room, called Sisal. It still needed some more color so I also threw in the peacock color I used in the Bub’s book nook:

I know it looks random, but I had a plan for it later that I knew would help make it work. The red was bothering me though – it was just too bright. So I grabbed the Chocolate Cosmos color I used on the front door and repainted those boards:

Much better!
Like I said, I had a plan to make them a little more cohesive still, and the first part of that was to use my Annie Sloan clear wax to cover the whole thing:

It gave it more of a matte look, which is what I wanted. It took less than two minutes to wipe it on quickly and wipe off any residue. When that was dry I went over the whole thing with the AS dark wax as well, just to tone down the colors even more. If you don’t have wax, stain would work much the same way, but you need very little of it!
(Sorry I don’t have pics of the dark wax part, I did that at night. I just wiped it on, wiped it off.)
After it was dry I painted some extra lattice the Storm Cloud color and added a frame around the art:

The waxes took away the shiny look, but left the (toned down) color:

The size is PERFECT for that spot, and the colors work perfectly in our family room!:

I went out on a limb with that peacock color, but I’m so glad I did! I love the added pop it gives the whole thing! And I use a bit of that color in the kitchen, so it helps to tie the rooms together.
It has different looks based on the direction you look at it – more subdued this way:

But deep and rich from the other direction:

It matches the colors in that little bowl on the mantel perfectly!
I thought about sanding it down like the PB version, but it was rustic enough as it was, so I didn’t want to do anything more to it. I love mixing up styles like this – the rustic look of the art with the more contemporary rug makes this space interesting to look at but still cozy. (At least I think!) ;)
I love how it turned out – even better than I imagined! Although now I don’t know if I want to keep it there -- I think it would look awesome in the basement! But for now it’s staying. :)
The PB version is 22.5 inches square and $150! My version is 26 by 36 inches and cost me $15 in wood (I had most of it already):

Not bad, eh?? I love this because you can customize the colors to work for your space so easily!
This one did take me some time – figuring out the layout went pretty fast, it was the painting that took a couple hours. It was nice, mindless work to do while we watched the Colts (win!!) yesterday though.
Don’t forget our fall linky parties kick off tomorrow at Layla’s place! For more info go here.


