Showing posts with label dollar-tree. Show all posts

Thursday, October 25, 2012

Paper Halloween

Hey hey! Hope you are having a great week! I’m dragging today – between a late night car break down and a cold that came on super fast last night, I’m in a bit of a fog today. I apologize for any misspellings in this post ahead of time. :)

When it comes to Halloween decorating, I’m all about quick, easy and stuff that doesn’t take up valuable storage space. We put up most of our Halloween decor outside, and I don’t do a ton inside just because I always go through the fall/Halloween dilemma. Put up fall, take it down, do Halloween, put it back up after? Or put up fall, add some Halloween in here and there? The older I get the more I go for the latter. ;) Over the past few years I’ve come up with a solution that meets all of those criteria – the easy to store and cheap part especially. I love experimenting with different ways to use them too.

I’ve shown you a few of these ideas before – one of my favorites is using our lamp shades. What looks like this during the day:
wooden box fall decor

Has a little surprise at night:

Halloween paper cut outs on lamp shade

I just cut out the shapes years ago with my vinyl cutter – they have kept fine over the years. (I use a little bit of spray adhesive or just tape to put them on the inside of the shade.)

On most of our lamp shades you can’t see them unless you turn on the light, but some are lighter so you see them during the day too. I just think it’s such a fun little Halloween surprise:

Halloween paper cut outs on lamp shade

Of course our infamous Martha Stewart mice usually go on the stairs:

mice cut outs on stairs

We put them up this year too, but when I finished this next project I realized it was a bit much, so I took some down. I have a new spot in mind, we’ll see if I have time to pull that off before Halloween. ;)

Last year I showed you how I added a gaggle of bats on the wall:

paper bats on wall

Is it a group of bats a gaggle? Who knows. Sure. I’m tired people. ;)

Well, back then our walls were that pinkish hue and the paint was a flat sheen – so when I took down all of those bats the sticky stuff I used to hang them left a billion little dots on the wall. Niiiiiice.

The walls are eggshell now, so we probably won’t have that problem again, but I wasn’t taking any chances. This time I added them to the old windows I have hanging near the staircase instead and I LOVE how they look!

I just used that sticky gummy stuff again to put them right on the windows:

paper bats on wall Halloween

I bent up their wings to give them some dimension:

paper bats on wall Halloween

Last year I added some eyes to a few of them:

paper bats on wall Halloween

So fun!

They make a impact but didn’t cost much – well really anything:

paper bats on wall for Halloween

I wanted to add more but tried to show some restraint.

I was planning on making some quick Halloweeny pillows for the settee but then the monster cold hit me last night and that wasn’t happening. Maybe I’ll get some whipped up this weekend. Or maybe I’ll just sleep. :)

Our skeleton friend hangs out to greet our visitors:

sparkly skeleton

He’s just chillin’. Feet crossed. He should really close that mouth though. So rude. :)

He doesn't show up great so I may spray him with some sparkly silver spray paint to brighten him up a bit.

I love using paper for Halloween decorations – it’s cheap and takes up hardly any storage space – you can’t beat it! If you have a Silhouette or similar vinyl cutting machine it takes no time at all to create these. If you don’t, you can usually find them at craft stores and I found a TON of different options at the Dollar Tree last fall and this fall.

There are also printable options online – I found a great resource here with a bunch of Halloween images you can print and cut out on your own.

What’s your go-to Halloween decor? Does your family get into the really spooky stuff or does it stay cute and lighthearted?

Tuesday, September 18, 2012

Fast fall tablescape idea

fall decorating ideas

Hey there!! I’m back today to help kick off our fall linky parties – they start today over at Layla’s place (The Lettered Cottage):

fall linky parties

Today’s party is all about tablescape ideas and I can’t wait to see the beautiful fall tables!!

Well, since we decided to change up the dining room (and make it a library), we no longer have a dining room table. ;) I do kind of miss decorating one, just a little. It was fun to decorate…at least I could do that even if we never ate at it. ;)

Here’s one of my fall-inspired settings from a couple years ago:

fall table setting ideas

Now, I dream of a long farmhouse-type table in our kitchen. Which is not happening unless we knock out a wall or two. Hmmmm…

Anyway, I thought I’d share one of my favorite decorative pieces and how I worked it for fall. It would be perfect down the middle of a kitchen or dining room table!

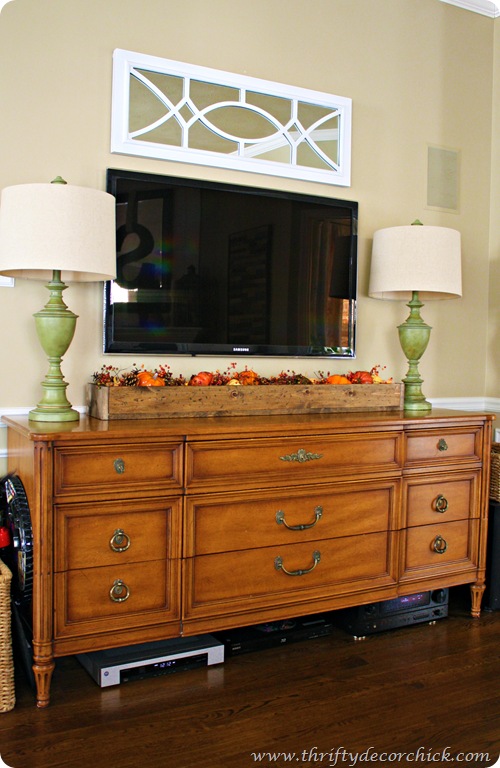
I showed you how I made the “trough” under the TV in the family room here. It was SO easy to make, and super cheap! (Free for me since I used scrap wood.) It was a tad thin, so I’ve had a plan to make one that’s just slightly wider so I can cram more decorative stuff inside.

So I did. :) I grabbed $10 worth of wood and put it together like I showed you in the link above. It only took me about 30 minutes from start to finish, it really is so simple (especially if you have a miter saw).

This one is the same length, but about three inches wider. For more STUFF. Whooo! For this fall-themed piece, I started with my standards – the beady stuff:

fall filler

And a bag of pumpkins I got for $1 each at Walmart last year:

walmart pumpkins

I was going to spray paint them for another project but they were the perfect size for the trough. I filled it with the beady stuff and then laid the pumpkins in here and there:

fall decorating ideas

I still needed to fill a few spots, so I added a few pine cones:

fall decorating ideas

All it needed now was some ambiance. So I grabbed some of my tea light holders and stuffed them in any empty spots:fall decorating ideas

Obviously you DON’T want to use real candles! I use the little LED votives from the Dollar Tree – three for a buck and I love their warm light:

 LED votives fall decor LED votives fall decor

I use them for everything now, have for years. With the kiddo and cats that climb all over anything, I just don’t feel comfortable with real candles anymore. At least in a spot like this. :)

And the fake ones flicker like a real candle. Love them.

The new trough holds way more, which is important for fall and Christmas! That filler isn’t wimpy:

wooden box fall decor

The thinner one sits perfectly in one of our longer window sills, so it will stay out. :)

This is our first touch of fall this year, and I love it so much I think I’ll keep the “candles” lit all day!:

wooden box fall decor

Wouldn’t something like that be lovely on a table? I had all of my filler, but you need some, I find the beady stuff and fall items at Hobby Lobby. It’s on sale constantly this time of year.

What do you use for the middle of your table? It’s such a simple thing but can be so hard to decorate, at least I think.

We’ll be back later this week (Thursday) with fall decor for the outdoors!

**I keep forgetting to mention! The Show Us Your House party for this week has been moved to next Monday, the 24th! Sorry about that! :)

Monday, October 3, 2011

Before & After Party: Ghosts in the Trees!

Well hello! I hope you had a wonderful weekend! I got SO much done around here. DIY-wise anyway. You can’t walk through the house without stepping on a toy or a piece of clothing – but the projects went very well! ;)

It’s time for the October Before and After Party, and I’m also linking this up to Kate’s fall craft party tomorrow! Linking a party up to a party --  not sure that’s even allowed.

Breaking the law! Breaking the law! (90’s flashback anyone?) ;)

fall linky party

Anyway, I’ve got a super quick, super cheap, SUPER FUN Halloween project for you today – it’s adorable. And the kids will LOVE it.

I had this idea last Christmas, and I doubt I’m the first to come up with it. But, really, am I ever? I doubt it. Too much awesomeness out there.

I bought a package of small Dollar Tree ornaments last year just for this project, and the rest of the stuff I had on hand:

halloween ghosts using ornaments

I used some scraps of batting (I knew they would come in handy someday!), and some muslin. If you don’t have these – you can easily skip the batting, and the muslin is SO cheap.

I just wrapped a piece of batting around the ornament, and made a hole so the top could stick out. Then I covered that with the muslin:

IMG_7250 IMG_7251

Later I snipped a hole in the muslin as well, so I could hang them.

Like I said, the batting is not necessary – I just thought it would make the ghosts a little more chunky chunky. (Which is never a bad thing.)

I used some Halloween ribbon I had to tie a “neck” around the ghost:

I ran out of that after the first few, so I just used some twine for the rest.

Then…you take a cutie patootie I could just squish him Bub and have him draw faces on them:

IMG_7258

So cute I could squish them faces!:

The faces were so precious, I just couldn’t bear to leave them outside in case it rained. So these stayed in, and we made more (without faces) for outside.

I taught the Bub how to use my camera the other day, and now I have to fight him for it every time I bring it out. (GREAT idea, really. Gah.)

He’s caught some surprisingly great photos though!:

DIY ghosts in trees 

We hung them with twine throughout the trees:

ghosts from trees muslin

We loved them so much, I dug a few more little ornaments out of the Christmas bins to make a few more. :) They hold up great to the weather too – we’ve had a ton of rain and they are doing great.

They are SO CUTE swaying in the wind. They make me smile so BIG when we drive up to the house.

I’m thinking about adding some felt faces to them, or maybe some googley eyes. Wouldn’t that be adorable?

So here’s my (FREE to me!) Halloween/fall craft before and after! From cheapy Christmas ornaments:

To cutie friendly ghosts swinging in the trees:

I can’t wait to see what you’ve been up to! Any fall goodness this month? And don’t forget the craft party at Kate’s place on Tuesday!

If you would, please link this post to the post you are linking up – I really appreciate it! You can copy and paste this button in as well if you’d like!:

beforeAndAfterButton