Showing posts with label hobby-lobby. Show all posts

Saturday, July 27, 2013

Boxwoods for spring

Hello all! How are you this fine Tuesday?

Sooo, here’s the thing. If it’s not going to feel like spring, then I’m just going to pretend. Sound good? Good.

I’m trying to think of ways to change up what I already have to make it work for the season. I don’t do a ton of spring decorating, and usually what I do use ends up staying out until July (or so), but I do like to bring some more natural decor into the house about this time of year.

You know…when it should start to kind of sort of feel a teensy bit like spring. But it doesn’t.

I’ve noticed that boxwood decor is out and about at the stores a lot lately. I guess I’ve always used topiaries and mossy stuff all year round, but it seems to me there’s more of the boxwood variety specifically this year.

So I got to thinking – I have a couple preserved boxwood wreaths from Christmas:

boxwood wreath Christmas

They were just chillin’ in the holiday closet downstairs and I decided to bring one of them up. Since they are preserved boxwood they are supposed to be misted with water once a month or so. Mine haven’t be touched since the end of December, so I gave this one a nice watering:

preserved boxwood wreath care

I was going to use a bright spring ribbon, but at the last second went with the same burlap I used during the holidays. The texture that I loved at Christmas feels natural to me and perfect for spring too:

spring boxwood wreath

I just tacked it on the back of the door with a hammer and an upholstery tack I had nearby:

hanging wreath on door with ribbon

You know, who doesn’t have upholstery tacks laying around? Most of the time I just hot glue the ribbon to the top of the door but I was feeling lazy.

It looks lovely on our pantry door – and totally springy!:

boxwood wreath spring

At least I think so anyway. I love how green and lush it is – anything that brings some life to a space works for me this time of year.

Here’s a few other springy boxwood creations I found – this faux wreath is so pretty with little flowers sprinkled throughout:

spring boxwood wreath

(source)

That would be so easy to do if you have one on hand like mine!

And if you have any doubt that boxwood works for spring decor – just put some eggs on it and you’re good:

boxwood wreath with easter eggs

(source)

I love that for a spring wreath!

I thought Tricia’s bunny boxwood wreath was pretty darn adorable:

boxwood bunny

(source)

I mean, come ON. Precious!

I used some faux boxwood from Hobby Lobby to make a little boxwood plant forever ago:

faux boxwood

But Jen had a much simpler plan (and hers are cuter!):

DIY boxwood topiaries

(source)

And I loved these preserved boxwood mats for crafting – the possibilities are endless!:

boxwood mat crafting

(source)

Those mats reminded me of my mossy “S” I made years ago:

DIY moss letter

OK, it’s not boxwood, but close. And so easy to do! Messy. But easy. :)

So what do you think? Does boxwood work as well for the spring as it does the holidays? Do you use it this time of year?

P.S. You can find out more about the pantry here. And more about the fork and spoon above the door here. :)

Tuesday, December 11, 2012

Reindeer vignette in the foyer

Hello there! First of all, thanks for all the well wishes here and on Facebook! I really appreciate it.

I felt pretty good this morning and threw together a little vignette for Rhoda’s party – the next in our holiday home series:

I had grand plans for putting together a pretty vignette this weekend, but then the sickness hit and it just didn’t happen. When I say I threw this together, I mean it – and just so you know, I don’t say that in a braggy way, I say that so you know that it doesn't always need to take a lot of stuff and a lot of time to put a little something together!

I started with these cute particle board reindeer I picked up at Hobby Lobby a few weeks ago:

cardboard reindeer

I’ve bought very little new Christmas decor this year, and actually plan to get rid of a bunch more (it seems I cut my stash by a third every year). But these were just too darn cute to pass up. Each one was $6 and I got them half off, so $9 for all three.

It took about three minutes to put them together, and they were MUCH bigger than I thought they would be, so I only ended up using two. If you need something big to fill a spot these would be perfect!

I set them up on our front foyer buffet and then was on the search for stuff to fill in the empty spots. I started with some clips of some real greenery, and then thought of these cute light bulbs I’ve had forever:

colorful christmas bulbs

A friend gave me strands of these lights years ago because most of them were out. I LOVED the bright round bulbs, so I took each one off and saved them.

And then didn’t know what to do with them. ;)

Last year that were just placed in the glass candleholders, this year I have new plans for at most of them.

The others I just nestled into the greenery around the reindeer:

reindeer vignette

I wanted this to be a fun little vignette, nothing too serious. The bright bulbs were the perfect addition.

I added a flocked tree I picked up last year for some height and was pretty tickled with the result:

reindeer vignette

It was cheap and easy and I had everything on hand. And it was QUICK – the most important thing to this girl (points to self with both thumbs) this week. :)

I LOVE these reindeer with their bright houndstooth!  I only used two – there was a brown one too but like I said, they were much bigger than I thought they would be:

reindeer vignette

They even have a little bit of glitter around all the edges. And the best part – they come apart and store away flat – brilliant!

Our musical advent calendar sits at the other end of the buffet:

reindeer vignette

We got it from Costco and the Bub LOVES it. When you open the little doors the music comes on and the little vignette lights up and moves. So adorable.

So there you go – it’s not the most amazing vignette ever, but it’s cute and colorful and that’s what I want guests to see when they walk in our home this season. It makes me smile, especially those houndstooth reindeer. ;)

Can’t wait to see what you’ve come up with over at Rhoda’s today! And don’t forget my annual Christmas tree party coming up on Thursday! Can’t WAIT!

Monday, December 12, 2011

Christmas Craftastic!

Well HEY! Hope you had a great weekend! I determined I was totally joking about being done with the Christmas decorating. :) I put up another tree and have at least one more spot I want to deck out.

I think this is the latest I’ve been working on decor in a long time, but I’m having fun with it so I’m not worrying about it. I’ve used VERY little of what I’ve used in the past. It’s been fun to change things up a bit!

Today I worked on a couple crafts I’ve been itchin’ to do for a while now. Kate’s Holiday Home craft party is the perfect reason to get them DONE!

OK, the first craft I was alllllll excited about – I was able to visit a spectacular Anthropology store over Thanksgiving (I still plan to tell you about that trip. It just may be Easter by the time I get to it.) and my girlfriend and I saw these and fell in love with them:

anthropologie tree jars

Their prices on the other hand, were INSANE. I think the big ones were $25 or maybe $30-something?

So of course, I think, OH, I could SO do those myself! The day after we got home, I went out and got the supplies to make them.

And the next day I started seeing them pop up ALL. OVER. blogland. They are that easy. And cute. :)

I wanted to do them anyway, and I changed them up just a tad, so bear with me if you’ve seen this eleventy billion times.

I started with cheapy little trees from Michael’s:
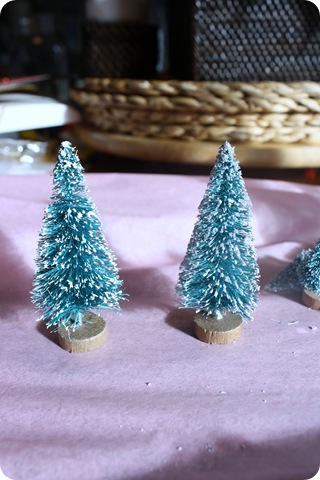
You get a package of various sizes for $1.99. They were already “snow” covered, but I wanted them to glisten with CHRISTMAS.

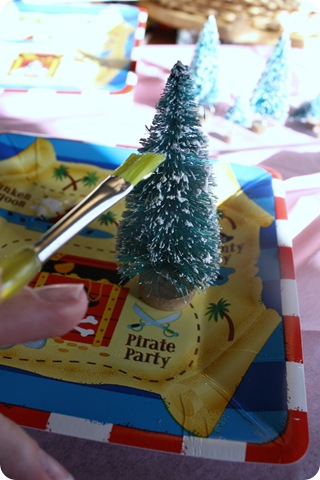
I used my Aleene’s clear glue and just brushed it on the sides:
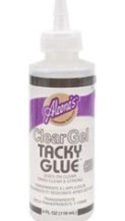
aleenes clear glue

Excuse the leftover pirate party plates. ;)

I used three different types of glitter to pretty them up – a silver, white, and one that is teeny tiny little glittery balls. It is beautiful!

I just dipped each tree with glue into the good stuff:

And let them dry. That’s it!

I have bajillions of Ball jars but ZERO lids for said jars. I was going to rig up something so they could sit upside down like the Anthro version, but then thought – WHY? – and just filled each jar with my faux snow and then the little trees.

I got some little pinecones and jingle bells from Hob Lob for half off and dropped a few in each jar as well:

The end result isn’t the exact Anthro version, but just as cute. (I think.):

I mean…really? I already had everything but the trees and the little fillers, so each jar was about a buck for me. But even if you started from scratch, you’d be able to do each one for less than $5.

Really Anthro? Reheheheally?

The pics don’t show how much the little trees glitter, but they are so pretty!:

mason jars christmas

If you want the fine snow look like they have, just use Epsom Salts. I have some but it was up in the bathroom and this was SO EASY, I was that lazy and didn’t want to go get it. :)

I found a little sled at a barn sale years ago, and I just laid it on the living room coffee table and placed all these goodies on it:

The trees are a little bluish green for my taste – I would rather have a true green. But when I got them in place, I realized they work perfectly with the blues in the living room:

anthropologie christmas jars

So pretty and so easy! And CHEAP! Ohhhhh so cheap.

The next crafty project is one I had going in my noggin for months – and I couldn’t believe how easily it all came together. I started with the glass pieces I had on the dining room centerpiece till just recently:

I got most of mine from Goodwill, but you can find them for cheap at Hobby Lobby as well.

A few weeks ago Michael’s had all their Martha Stewarts paper punch thingies on sale, so I picked up a couple for this project. The first was one that punches out a line of the design out of the paper:

martha stewart paper punches

I found this paper at Hobby Lobby – it’s in their “special” paper area – the $1.99 a sheet stuff. (I got it half off.) This one is a grey linen-like paper that looks JUST like fabric. It’s kind of shimmery and so pretty!:

I just used spray adhesive on the back, then wrapped it around the glass candleholder.

For my next version, I used the big snowflake cut out on my sparkly white paper (also half off):

snowflake paper punch

I used a strip of the paper and then the punches on some other glass pieces:

Again, I just sprayed the back of the paper with spray adhesive. If I want it to stay on there it will, but if I want to reuse these I can just take it off and wash off the adhesive.

For the final version, I used this beautiful scrapbook paper I found in the fancy papers as well:

Again, half off. :) I got each sheet for a buck and only used two sheets. For this one I just simply wrapped a few candleholders with the paper. It’s SO pretty on it’s own!

At first I was going to line them up along the stairs:

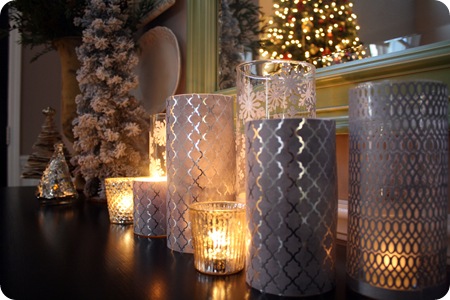
But then I realized how beautiful they’d look all together! So they ended up on the foyer table:

I added a couple mercury votive holders I had from Pottery Barn (I think they were $3 each?) and finished off the little candlescape.

Of course, it looks ahhhhmazing all lit up:

Isn’t that beautiful?

One of them is a real candle I wrapped, but for the others I’ll use my little LED candles.

I can’t get over how pretty they are – and it’s just PAPER!!
IMG_9329

The entry table is very low key – just some greenery from the back yard in an urn, some decorative trees and now the candles:candleholders covered with scrapbook paper

And I figure all of them can stay out through the winter months.

LOVE them!!

This project cost me about $6 in paper and I think the paper punches were about $15 total on sale. Considering I’ll easily be able to use most of these throughout the year (not the snowflakes of course), I’m thinking that’s money well spent!

Check out Goodwill for these glass pieces – I found most of mine for a dollar or two a couple years ago!

I’m thinking about adding some of the faux snow to the top of the buffet for some fun, but I’m afraid “fun” will become “MESS” real quick. ;) I may try it out to see what happens.

white and silver christmas vignette

So there. you. go. – my latest Christmas crafty goodness! I tell you what…when it goes well, crafting is so cathartic and relaxing. I enjoyed it so much, I have a few more projects I’m hoping to get to before the end of the season!

I can’t wait to check out what you’ve all got up your sleeves at the party! And don’t forget our Holiday Home link ups will finish up this Wednesday with my annual Christmas Tree Party!:

christmas tree party

I can’t wait to see your gorgeous trees!

Have you been getting crafty lately? Were they successes or fails? I never know till I start if it's going to work or not!