Wednesday, October 30, 2013
Need A Gift For A Teen?
One of my all-time favorites is a Slumber Party Kit.
Take a basket, add a movie (or movie tickets), then microwave popcorn, drinks, and big boxes of candy (teens LOVE food!). Go to the dollar store and buy light sticks/glow-in-the-dark bracelets. Add a deck of cards.
If you want to make it bigger, add a fuzzy blanket or some fun socks. For girls add spa-type stuff (face mask, nail polish, lotion), or for boys add things like a whoppie cushion, yo-yo, or Nerf football.
Guaranteed to please.
Tuesday, September 3, 2013
Staircase nook
Hey hey all! Well, it’s about that time! I’m off to Atlanta today to prepare for the Haven Conference that starts tomorrow. It’s been a year of planning and I can’t even believe it’s already here! SO excited to see everybody.
So I finished up a quick little project this week that I’ve been meaning to do for months. Or a year. A year and a few months.
We have a little ledge/nook/cut out spot in the basement staircase that has been sitting half way done for that year and a few months:
You may remember that I installed a wood wall on the main wall in the staircase about this time last year. I still LOVE that wall. So very much.
Before we had the basement finished the wall next to it going down the steps had a weird cement wall bump out thing. Instead of drywalling all the way up I asked them to make it a little ledge instead. They installed a wood piece that I was planning on painting later, hence the stain spatter I didn’t worry about:
But since then I’ve decided I wanted it stained instead. I’m kind of obsessed with the look of the dark wood against the gray blue walls (Marina Gray by Ben Moore) and white trim down there.
So I needed to sand off that stamp and the stain dots:
It just took a few seconds and I was ready to go – then I taped everything off with my Frogtape really well. I find it’s hard to keep stain from going everywhere since it leaks easily and spatters all over the place. (It could be the operator, who knows.):
After I wiped everything down well (and let it dry), I grabbed my dark walnut stain and went at it:
Remember when you stain to work quickly and to keep the “wet edge” – if it dries at all during the process you’ll see where you left off. OH, and wear gloves!! Trust me – no matter how hard I try I always end up with stain on my hands.
I let it sit for a few minutes and wiped the excess off. I only usually do one coat – I find that’s plenty for the color I want.
While it dried I started hanging the frames I’ve had leaning there forever. Most of them are pics from the Macy’s Thanksgiving parade/NYC trip I showed you here, but there was one collage my stepdaughter gave us last Christmas (so sweet!) that I wanted to include too.
Here’s a little tip when hanging pics that have two hangers instead of one – just tie a piece of string or wire between the two:
Then hang that on the the nail. SO much easier. I mean, sometimes what you’re hanging is heavy enough you’ll want two nails, but most of the time I find one is just fine. And this way you don’t have to worry about measuring, finding a level, all that stuff. Ain’t nobody got time for that.
Like all of my gallery walls, I just kind of put stuff here and there – yes, that meant a few extra holes in the wall but they’re tiny. The wall will survive:
I was trying to use frames that I had on hand and I liked the (mostly) matching frames, so I didn’t go crazy trying to fill empty spaces. The “S” we’ve had for years and it perfectly filled one spot that was bugging me.
The ledge has plenty of room for accessories, but for now I just left a couple candlesticks we had here before (they ended up on there because I was too lazy to take them all the way to the storage room):
They are fake candles and they operate on a timer, so it’s kind of cool to have that little glow as we walk down at night.
It was a quick project and I think it turned out pretty cute! I love how it looks with the planked wall:
Next up in this space – touch up the wall and ceiling paint and install chunkier baseboards. Maybe I’ll tackle those in another year. Baby steps.
So are you loving gallery walls? I am and I don’t think they’re going anywhere soon. It’s such a personal, easy way to fill wall space! And remember you can find frames at Goodwill for super cheap and spray paint them. One color for all of them will unify frames no matter their design.
Friday, July 26, 2013
May Before and After Party!
Hey hey all! How was your weekend? Ours was fantastic!
Welcome to another Before and After Party to kick off the month! I’m sharing a few of your awesome projects from last month first today and then you’ll be able to link up yours!
First up – I loved how simple (and cheap!) Angie’s mirror project was!:
It’s one of those ideas that makes you wonder why in the heck you didn’t think of it??
Julie added a few spring updates to her gorgeous dining room:
LOVE that room! So classic and pretty!
Ann made some simple changes to her dining room as well:
Again, what a pretty space!
You won’t even believe how this beautiful mirrored dresser of Laura’s started out!:
Seriously, you have to go see the before – amazing job!
Elizabeth shared her gorgeous, bright kitchen redo:
This is another one where you have to go see the before to truly appreciate the transformation. ;)
I LOVED this sweet boy’s room of Janel’s:
Isn’t that so much fun? What a cool room for a little boy!
And finally, but certainly not least – I couldn’t believe Nicki’s new kitchen backsplash:
I couldn't believe it because it’s not tile. ;) Awesome!
As always, if you’d like to pin these awesome projects and spaces, please do so from their respective sites.
Now it’s time to see what you’ve been up to this month! If you’d like to be considered in next month’s review, please ad a link or the html for this button to your post:
<div align="center"><a href="http://www.thriftydecorchick.blogspot.com/" title="TDC Before and After" target="_blank"><img src="http://www.homestoriesatoz.com/wp-content/uploads/2012/03/beforeAndAfterButton_thumb1.gif" alt="TDC Before and After" style="border:none;" /></a></div>
Here you go, link up yours now!:
Wednesday, November 9, 2011
Farmhouse Industrial Modern?
Last year I told you about my Suburban style. “Real” decorators – especially those on TV –- seem to think “Suburban” is a bad word. I happen to think it’s lovely and warm and so ME.
Oh, the horrors! ;)
Over the past year or so, I’m drawn to different styles and feel like mine is changing a bit. I just have no clue what to call it now. I don’t know if it’s all the lovely blogs out there or just the natural ebb and flow of my decor taste, but things, they are a changin’.
The other day I was looking around at some of my purchases over the past few months and they just showcase my decorating confusion. I thought I’d share a few of them with you. :)
I visited one of my favorite spots in Indy a couple of months ago – a salvage and architectural shop that I don’t think I’ve blogged about yet. (I will soon cause it’s amazing!)
We were in a bit of a hurry, (it’s the kind of place you need at least an hour to look through) but I did find this old crock:
I’ve always been drawn to all things old and full of character. I absolutely LOVE it and the light blue “6” on the front. The price was crazy good too – only $20!
It sits next to the sofa and I fill it with blankets:
Score one for the antiques! Or farmhouse style? Cottage? I have no idea.
For months and months I’ve been trying to figure out what to put on the wall to the left of our stairs. I can’t find a good picture of the scrolly iron thing that I had up there, but you can see a smidge of it here:
I’ve used those iron jobbies forever and a day to fill wall space, but I’m trying to move on and change it up a bit.
The iron piece was way too small for this wall anyway – but figuring out what to use instead was stumping me big time. I didn’t want a gallery wall, cause it would be too busy with the one on the stairs. I didn’t want to do a mirror, cause I have one over the foyer table. So what the heck else do you do?
Well…a find at a small town antique shop nearby solved that problem…at least for now:
(Yes. The Halloween mice are still out. I’m throwing in some spooky style into the mix.)
I found a few old antique windows, cleaned them up and hung them on the wall. I love the colors – they came in the white, blue and brown – perfect for our house! And I love how they fill up that large wall. I may do some adjusting but I’ve already got eleventy billion holes in that wall as it is.
Sooo…old stuff, two points.
Over the summer I found this little beauty at HomeGoods:
It’s the cutest little stool I ever did see! The grey color and metal legs lean more toward an industrial look, but the cute little number on the top is more farmhouse style:
Half point industrial, half farmhouse. I’m so confused. ;)
Finally, I totally blame blogland for this one. My friend Chris made my multiple decor personalities issue even worse. She found a lovely table at World Market and I was smitten.
I was sitting in a waiting room when I read her post, and it just so happened I was about 50 yards from a World Market. Curses!!!
So I went. And I got it:
(Yes. Those are seashells still on display. In November. I told you I’m all over the place.)
Dang her and her awesome taste!! I got it for a great price because I found a coupon online (they took it off my phone – hurrah!). You can find the table here.
I’m IN LOVE with it’s modern look – the shape, the design, the glass top. I swoon every time I walk by it. I’m still thinking about taking some Rub n Buff to it to change up the color a bit, but we’ll see about that.
Sooo…score one for modern style.
That leaves us with…uh. Major design confusion. ;)
I wouldn’t even call my home eclectic cause I when I hear eclectic I think funky – maybe I’m wrong? Who knows what’s going on in my head and house. All I know is I LIKE IT!
I love the different pieces throughout our home and that they change up the look up around here. I’m just more confused than ever on what to call my style.
Modern farmhouse industrial old stuff suburban? It’s got a certain ring to it.
Has blogland influenced your style? What would you call yours? I hope it’s easier than mine. For your sake. ;)
Monday, August 8, 2011
A Rustic Table
Hello there! How was your weekend? We had a great one – guess WHAT? Stink Eye Sis got engaged!! :) So excited! So now we have a wedding to plan – how fun is that?
We also continued to get some stuff done outside. Make that ME – hubby was out of town and I sweated out a third of my body weight (I WISH) and worked on some outdoor projects. Funny that the temps have “dropped” into the 80’s and are a bit more bearable, but that coincided with humidity out the wazoo.
Intense.
Anyhoo.
We had a set of tables on our deck that I wanted to change up this weekend:
They’re actually ottomans that came with our furniture. They had cushions on top, but those fell apart (hmmmm…mental note that cushions don’t like snow).
Sooo…we had the bases and I thought they made a great coffee table set up. But when I got it all in place, there was just too much metal going on, you know? Metal coffee table, metal chairs with legs, metal side tables…with legs.
You see what I’m saying.
So I wanted to add a different texture and warm it up a bit. My DIY trough gave me an idea:
I took a trip out to my True Value’s lumber yard (I go to the one in Pendleton Indiana, and LOVE it) to get some more cedar wood.
I got some ten foot boards and a couple eight foot furring strips (which are just unfinished strips that I sometimes use as a base to projects). I thought a bit about how I was going to do this and then decided to start with the tables upside down:
The dog must remind you that he’s here every chance he gets. ;)
I realized when I got home that the wood I picked up was pine, not cedar. I know what pine looks like and I know what cedar looks like, so I have no idea what I was doing. Cedar would be my ideal choice for outside, but there’s no way I was driving back. :)
The table doesn’t get any direct sun or rain, so it should hold up just fine. (I say that while crossing my fingers.)
I cut the furring strips to make a base around the table:
I just screwed them in at the ends to connect them – not into the metal table. I made it tight, but later realized it may have been too tight. I could have given it a little more wiggle room.
When screwing into wood, especially thin wood, and especially soft wood like pine, you always want to use a drill bit to prep for the screw:
Otherwise you risk splitting the wood. I used outdoor wood screws, and I still used my drill bit. Sometimes you can get away with it, until that time you don’t and it ruins a piece of wood. Ask me how I know.
Once my frame was done, it looked like this:
I knew I wanted a “skirt” around the table, so I used the 1 by 4 pine boards to surround the furring strips:
I installed them the same way – into the ends (like furring strips above) and then into the furring strips as well:
I put boards on top so I could see the thickness I needed to make the top flush, then installed the skirt. Does that make sense?
I did that so I could lay the top boards on and they would be flush with the frame:
Before I even started, I made sure that the pine boards would fit in perfectly, without having to cut down one of the boards. (I don’t have a table saw.)
The area inside the frame was a little over 28 inches, so I knew I could fit seven four inch boards inside, and still have a little breathing room in between.
If it wasn’t going to fit perfectly, I was just going to lay the boards across the top so instead of inside the skirt. I hope that makes sense!!
Then it was onto the fun part. The part where our neighbors were hating us. ;) We grabbed our tools:
And beat it up! Whoo! It’s good fun folks. I wanted it to look rustic and old and these did a pretty good job.
Then I gave it a decent sanding:
“Decent” means lightly swipe it over the wood as quickly as possible because I HATE SANDING with a burning passion.
Then I used my favorite stain and applied it with a foam brush:
You swipe it on, get it into the wood, then wipe it off. I was planning on doing more than one coat but I actually liked the look just after one:
I want it to have a bit of a contrast off the dark metal legs, so I think I’m sticking with one.
Like all of my projects, it’s not perfect! There are spots that don’t meet up perfectly, you can see the screws and the rough edges of the wood are showing:
But this time, it was all on purpose. ;) I didn’t want it perfect – since it’s outside, the more rustic the better. That’s my story and I’m sticking to it.
You can see above how I screwed the top boards into the “skirt” – now it’s all one piece. The long boards across the top lay directly on the table so they don’t move around at all.
I will finish this up with a coat or two of polyurethane, to protect it. I had hoped to get that done and style it all pretty for ya, but the clouds opened up and poured on us tonight, so this post is a bit anticlimactic. ;)
I do love love LOVE how it turned out though – just like in my head!:
It’s going to look SO good with candles and plants and that good stuff. :) And I won’t care if it gets beat up or something falls on it or whatever…it will add to the patina.
After a couple hours and $20 in wood, I changed up the look completely – gotta love that! And when winter hits we can take the top off and put it in the garage.
I hope to show you the deck soon – we still have to stain it though. This is the most dreaded project of ALL TIME people. Oh my dear. I’m so loving the space to much though, I can’t wait to show you. I’m determined to get it done soon.
This week hopefully. GoodNESS, it’s going to take FOREVER.
You busy this week? ;)
I was one of the bloggers selected by True Value to work on the DIY Squad. I have been compensated for my time commitment to the program as well as my writing about my experience. I have also been compensated for the materials needed for my DIY project. However, my opinions are entirely my own and I have not been paid to publish positive comments.
Tuesday, July 5, 2011
The Family Room (Redone)
Well folks…I’ve made a few changes to the family room over the past few weeks and I’m over the moon about them. I can finally say…
I LOVE OUR FAMILY ROOM!!
First time in seven years peeps. First time.
I showed you here how this space has driven me a bit batty for all that time. Many of you offered suggestions on furniture placement, and when I say we tried them all…we tried them all. ;)
The open layout and the location of the cable and surround sound stuff made it hard to make the layout (with enough seating) work.
So first up was a new sofa – a sectional to be exact. When we became debt free earlier this year, it was the one thing I was SO EXCITED to buy. We hadn’t paid for (I mean, PAID for) a piece of big furniture in seven years. And the sofa set from seven years ago just plain sucked. ;)
So we were going to splurge…but I wanted to make sure this splurge was going to last…well, FOREVER. So I did a ton of research. You can see the process here and here.
We decided on an Arhaus sectional, and I went against two of my original plans – one was I wasn’t going to get a microfiber sofa. But I did:
It’s actually called micro denier and it’s a soft as a bunny’s bottom. For reals. I have never pet a bunny booty, but I’m guessing it’s pretty darn soft. As soft as this sectional. ;)
It’s all polyester, so it repels liquids and stains like a supastar. Arhaus had fabulously large samples that I took home, and I may or may not have tested out said sample with some spills. Shhhhh…
All I knew is I didn’t want to deal with stressing over the sofa all the dang time. And I don’t.
All along I had planned on a slipcovered sofa, and then one day it hit me – what in the HUH was I thinking? I know me…and I know washing and drying and recovering every time something spilled would put me over the edge.
(This is me here, and you all know me is a bit cuckoo for cocoa puffs at times, so if you are searching for a new sofa, take that as you will. I’ve heard from MANY who love their slipcovers. They are just much more patient people than I. Me? I.)
Anyhoo, we ended up with the Lansbury from Arhaus:
We were able to configure it just as we needed – the left side of the sofa needed to be shorter to go under the window just so. The right side could be long but not too long. I didn’t want huge arms sticking out taking up space, and lastly – the seats needed to be deeeeep.
Working in the decorating biz years ago, I learned a few things about picking out a quality sofa and that one has stuck with me. This baby delivers on the deep:
I love the side view – isn’t that little curve so pretty?
The sofa is something like 103 inches by 80-something, and it fits like a glove in our family room:
I measured and moved and planned it all out beforehand, and I couldn’t be happier with how it fits in the space. At first it even seemed a bit smaller than I thought it would be, but there’s easily room for six people on there. (Six people who like each other, but six people.)
What’s most important is we (my family) can all pile on and it’s SO comfy. We are in heaven. :)
By the way – it is the most comfy couch I’ve ever sat my tuckus on. It’s kinda firm when you first sit down…and then you sink in and it’s perfection.
I was happy to find that, even though it’s deeper than our old sofa – it still gives us plenty of room for the sofa table and space in the kitchen:
I was concerned the longer section would stick out too much (even though I measured eleventy billion times and it was fine). But because it goes almost up to the window, it doesn’t go out much further than the old sofa:
It most definitely makes the room feel twice as big.
That’s not the only reason though – the second third 15th happiest day of my life occurred when the surround sound folks came and moved our TV from the crammed spot next to the fireplace to over the craigslist dresser:
OH HAPPY DAY!! I cannot express to you the difference it made in this space. It instantly doubled the size of the room, seriously.
I would have done it forever ago, but it wasn’t as simple as moving the cable jack. All of the surround sound hook ups were on the wall by the fireplace, so we had to have it done professionally.
They ended up moving a speaker (instead of putting in a new one, to save money) and ran everything through the basement. (Hooray for unfinished basements!)
So now this large wall is now the TV wall and it has worked out perfectly:
You might notice the components – the DVR, DVD player and receiver – are all under the dresser. I wanted them hidden away if at all possible and wasn’t sure it would work because of the potential dust under there. But the guys who did all the work kind of laughed when I mentioned that and said under the dresser will be no different than anywhere else. (And I believed them when I saw all of the dust in the old cabinet – YUCKO!)
They made sure there was plenty of breathing room under there, checked to make sure the remotes would still work and arranged everything for me just so. (We love Ovation in Indy – they always do an incredible job!)
(We did consider rigging the dresser and putting them inside, but I worry about the heat, and we use every bit of that dresser space for toys. :) We don’t even notice them under there anymore.)
The only issue that we’ve had (that I already knew would happen) is that we can’t watch TV from the left side of our kitchen (basically the island). It’s not a big deal, but come football season, (i.e.: parties) it may be. The solution is pretty simple though – we plan on changing out the TV wall mount for one that swings out. (Someday…not a priority!)
Right now we’re just loving how moving the TV has changed the room!
I can’t wait to show you more about this project too:
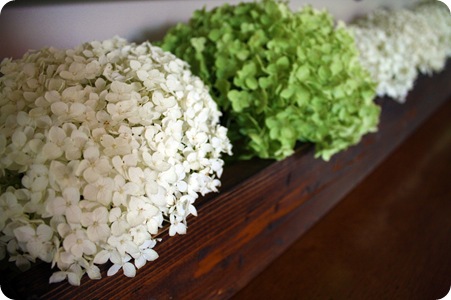
:) Love it!
Because the TV console was gone (whoo hoo party hardy God bless America!!!!!), I had a new spot with the potential for new seating. I waited till we got the sofa to make sure everything would fit OK, and then I checked out HomeGoods.
I have had so much fun changing up things a bit in this space – the chair is a bit contemporary but I LOVE IT:
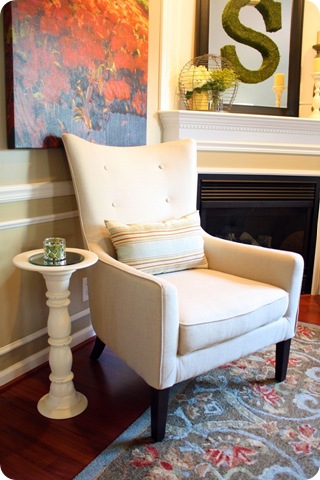
I knew I wanted something with legs to balance out the upholstered sofa. I also wanted something just a tad more sophisticated.
The little lumbar pillow in the red, blue, green and cream fabric that I showed you here adds a bit of casual, and the little candlestick turned itty bitty table fits perfectly next to it!
Having that console right up against the fireplace drove me mad. The chair still sits right next to it, but it’s a cozy, warm-by-the-fire-with-hot-cocoa kind of feeling now, not a the-TV-console-is-going-to-catch-on-fire kind of feeling:
I LOVE looking at this angle now.
LOVE.
(Yes, the poppy print is staying where it is. Not moving it, at least for now -- for numerous reasons, but mostly because we like it where it is.) :)
This wasn’t my most thrifty room, to say the least. But after years of paying off a mound of debt, we got to splurge and it feels awesome. I can’t wait to show you more of the accessories and art I DIYed in this space though – I’ve got some thrifty projects to share!
This is my new view as I blog every night and I couldn’t be happier:
What is it with my flip flop shots lately? Sorry about the feet thing.
It took seven years (did I mention that?) – but I finally feel like our family room feels as big as it really is. This new set up just works.
Here’s a couple of before and after shots for you – earlier this year when I removed the loveseat and just left the sofa:
We lived with that one sofa for six months and it worked OK till the end – then we kind of missed being able to lounge together in the room.
And don’t get me wrong…I’ve always loved the warm, comfy space this was. I don’t think the before was bad or anything…it just never worked quite right.
Now it does:
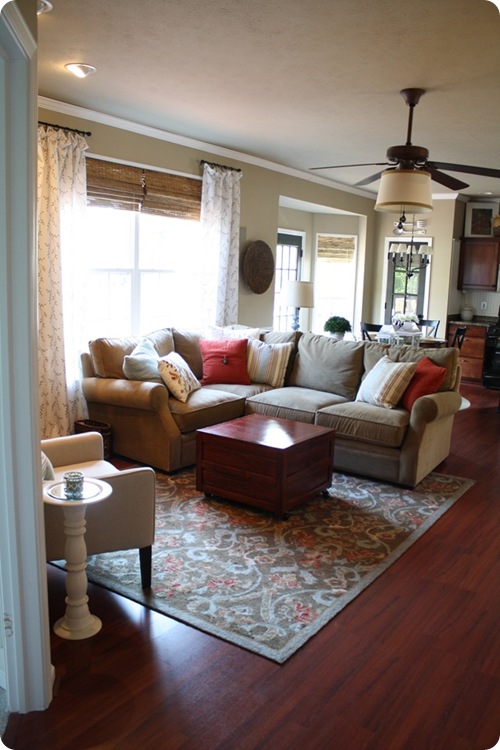
You’ll notice I took the drapes from the dining room. :) (More on that later.)
And a before before with both the loveseat and sofa and the TV console:
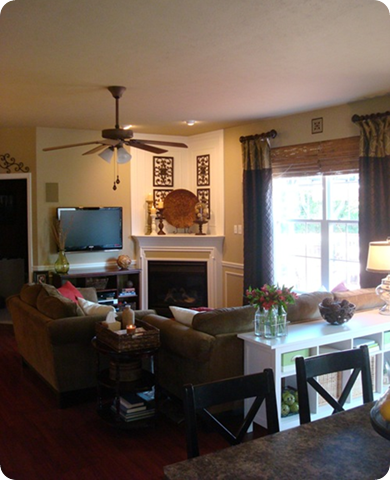
And how it looks today (the light was not great – sorry the pics are a bit washed out):
Up till recently, I thought having the sofa in front of the window would bug me. But I actually quite love it – it creates a weird cozy/open feeling all in one. (I did try our old loveseat in front of the window and it didn’t work – those big arms took up a ton of space!)
The sectional was the only way to make it work:
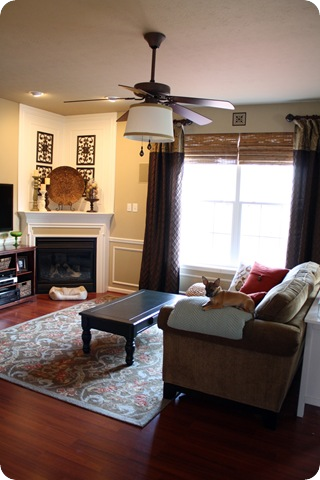
One final before (again, I don’t personally think this is a “bad” before):
And the after shot…at dusk. ;) Cause I love the evening shots:
I. am. thrilled. I’ve done quite a few happy dances over the past few weeks. ;) It was SO worth the wait. Really.
Thanks for letting me share and thanks for being patient with me!! I’ll be back with more details on some of the projects soon!
For now, can I get a WHOO?????
