Heya! I’m back today for the next par-tay in our fall link up series: 
Today we’re linking up fall outdoor decor over at Rhoda’s place (Southern Hospitality).
Last year I shared how I dress up the front of our house this time of year:
This year I wanted to do something for the back of our house – we had an AWESOME patio put in off our deck last summer and we are thoroughly enjoying it. The best part of the whole backyard is the stone fireplace we had installed.
I wanted to create a wreath I could hang on the fireplace – but it had to be able to handle the elements. Cause let’s be honest…I never take the outdoor stuff in. Like…ever.
I use the fake pumpkins from Hob Lob in our window boxes every year, and they hold up year after year. So I figured I’d start there. I had a stick wreath (from Hobby Lobby…of course. You know by now all this stuff comes from there.):
I just started sticking in faux pumpkins. A few bigger ones first:
And then some smaller ones around those:
These all have a wire pic that comes out of the bottom of them, so I just stuck that into the wreath. NO GLUE baby. If the pic stuck out in the back I just bent it back into the wreath. Make sense?
I had most of the pumpkins already, but I did pick up some beady stuff (again, are you surprised??) on sale. They were in big bunches, so I took them apart:
And filled in between the pumpkins:
Three of the beady bunches (say that three times fast) were plenty for this size wreath.
It still needed some FLUFF, so I grabbed some feather jobbies as well (all this stuff is 40 percent off ALL the time at HL):
I had them in gold and brown and used both colors – I just snipped each one off the pic and stuck them in here and there:
And because I could NOT resist them…I added just a couple little butterfly pics too:
They matched too well not to. I tried to resist the butterfly cuteness but they won out. :)
It took about 20 minutes to stick everything in (no glue helps to speed things along), and I was THRILLED with how it came out:
I rigged it up around the top of the fireplace with some jute twine – I tried one of those sticky wall hooks but it didn’t stay up for two seconds on that stone. The addition of the feathering things may make it a little less weatherproof – but I SWEAR I’ll bring it in when it rains. I love it that much. ;)
It is the perfect fall addition to the patio!:
We spend more time out here in the fall than any other time of the year – for two reasons. 1. Summer is too hot for fires. ;) 2. Mosquitoes LOVE ME. I can’t even be outside after sunset or I’m eaten alive. Uck.
I added some mums for some more pops of color, but didn’t have any extra planters. So I hid the cheapy plastic pots with some burlapy fabric I had:
I just tore off a strip and wrapped some twine around it to keep it on there. I wanted those cute wood planters some of the mums come in, but the stinkin’ mums are more than DOUBLE the cost just for those simple little planters with them. Nah way.
Last year I had big mums in the pots, but the plants I put in there earlier this summer are doing so well I will leave them:
I have no idea what they are, but they grow big and full – love them! The petunias survived our drought summer -- the twisty evergreen trees I planted in the spring did not. :)
The placemat pillows have been out constantly for the past year (even some of the winter…told you I don’t take stuff in) and other than being a little faded, they are doing quite well!:
The patio is ready for plenty of crisp fall evenings – around here they usually consist of a fire, some wine, maybe some marshmallows and a barking (but adorable) dog:
When are you heading over? Bring an extra blanket and you’ll be set. ;)
Can’t wait to see all the outdoor spaces over at Rhoda’s!
Don’t forget the Show Us Your House shindig will be this Monday, the 24th (I moved it back this month.) This month’s space is basements, rec rooms, playrooms – anywhere you relax and have fun!
We’ll be back with a couple more fall posts to finish up this series next week!


Hey there!! I’m back today to help kick off our fall linky parties – they start today over at Layla’s place (The Lettered Cottage):
Today’s party is all about tablescape ideas and I can’t wait to see the beautiful fall tables!!
Well, since we decided to change up the dining room (and make it a library), we no longer have a dining room table. ;) I do kind of miss decorating one, just a little. It was fun to decorate…at least I could do that even if we never ate at it. ;)
Here’s one of my fall-inspired settings from a couple years ago:
Now, I dream of a long farmhouse-type table in our kitchen. Which is not happening unless we knock out a wall or two. Hmmmm…
Anyway, I thought I’d share one of my favorite decorative pieces and how I worked it for fall. It would be perfect down the middle of a kitchen or dining room table!
I showed you how I made the “trough” under the TV in the family room here. It was SO easy to make, and super cheap! (Free for me since I used scrap wood.) It was a tad thin, so I’ve had a plan to make one that’s just slightly wider so I can cram more decorative stuff inside.
So I did. :) I grabbed $10 worth of wood and put it together like I showed you in the link above. It only took me about 30 minutes from start to finish, it really is so simple (especially if you have a miter saw).
This one is the same length, but about three inches wider. For more STUFF. Whooo! For this fall-themed piece, I started with my standards – the beady stuff:
And a bag of pumpkins I got for $1 each at Walmart last year:
I was going to spray paint them for another project but they were the perfect size for the trough. I filled it with the beady stuff and then laid the pumpkins in here and there:
I still needed to fill a few spots, so I added a few pine cones:
All it needed now was some ambiance. So I grabbed some of my tea light holders and stuffed them in any empty spots:
Obviously you DON’T want to use real candles! I use the little LED votives from the Dollar Tree – three for a buck and I love their warm light:


I use them for everything now, have for years. With the kiddo and cats that climb all over anything, I just don’t feel comfortable with real candles anymore. At least in a spot like this. :)
And the fake ones flicker like a real candle. Love them.
The new trough holds way more, which is important for fall and Christmas! That filler isn’t wimpy:
The thinner one sits perfectly in one of our longer window sills, so it will stay out. :)
This is our first touch of fall this year, and I love it so much I think I’ll keep the “candles” lit all day!:
Wouldn’t something like that be lovely on a table? I had all of my filler, but you need some, I find the beady stuff and fall items at Hobby Lobby. It’s on sale constantly this time of year.
What do you use for the middle of your table? It’s such a simple thing but can be so hard to decorate, at least I think.
We’ll be back later this week (Thursday) with fall decor for the outdoors!
**I keep forgetting to mention! The Show Us Your House party for this week has been moved to next Monday, the 24th! Sorry about that! :)


Hello there! Sorry about the later post today – my computer and I had it out for a good hour and a half this morning…but I won. So far. I need to be nice so I can finish this post. ;)
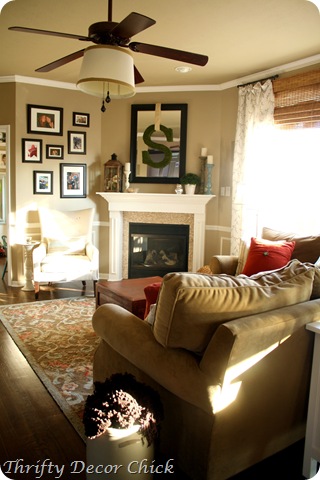
So earlier this year I showed you how I added some family photos to a small wall in our family room:
That little wall is kind of awkward and it was hard to figure out what to put on there – it’s not big, but big enough that it needed something substantial. I couldn’t do a mirror because of the mirror on the mantel. So I ended up with a collage of family photos.
I loved having them up there, but there was something about it that drove me a little batty every time I walked by – it just seemed too busy. There was a lot going on on that side of the room.
So for months I’ve been trying to come up with something to put on that wall. I couldn't think of a THING for the longest time. The frames stayed till a couple weeks ago when I had had it and took them down. But the blank wall was almost as annoying for me as the frames…so I got started on an idea that had been growing in the noggin for awhile.
I was inspired by these rustic wood art pieces at Pottery Barn:
The one on the left is 50 inches square and costs $400 – yowza. I liked it but putting it together looked like I’d have to actually use some math, so I decided against that one.
I liked the one on the right even more anyway, and it looked wayyy easier to copy. I had some scrap luan plywood in the garage, and the width was perfect – I just cut the length down to about 36 inches with my jigsaw:
Then I grabbed some scrap pieces of lattice wood and started laying it out:
This wood is pretty cheap and I use it quite often, so I had a decent amount of leftover pieces. I just laid out them out, figuring out what needed to be cut down as I went:
It was like a puzzle and actually quite enjoyable to figure it all out. I did need to go buy a few more of the lattice pieces to finish it up, and I cut those down in random sizes too.
I went ahead and nailed it all on the board when I was done laying it out, and like ALWAYS, saved my painting till after it was put together. I know some of you think I’m crazy for doing that, but it’s just one of my things…I need to see it together and get that accomplished before I paint.
And I wasn’t even sure what paint colors I wanted to use – I figured that out after it was nailed together. It wasn’t a big deal to paint afterwards, I just used my Frogtape to tape off each one:
I was able to reuse the tape over and over. If I had painted beforehand I would have had to wait for each piece to dry before installing – so the time I took to tape off was the same that I would have had to wait for the paint to dry. At least that’s what I tell myself. ;)
I wanted to use paint I already had, so I used a red color, a grey blue that I used on the back of the dining room built ins called Storm Cloud, the color we had painted in our living room and stairway, called Analytical Gray, and I was trying to figure out a fourth color to use as well.
I dug through the paint stash in the basement and found the wall color for the family room, called Sisal. It still needed some more color so I also threw in the peacock color I used in the Bub’s book nook:
I know it looks random, but I had a plan for it later that I knew would help make it work. The red was bothering me though – it was just too bright. So I grabbed the Chocolate Cosmos color I used on the front door and repainted those boards:
Much better!
Like I said, I had a plan to make them a little more cohesive still, and the first part of that was to use my Annie Sloan clear wax to cover the whole thing:
It gave it more of a matte look, which is what I wanted. It took less than two minutes to wipe it on quickly and wipe off any residue. When that was dry I went over the whole thing with the AS dark wax as well, just to tone down the colors even more. If you don’t have wax, stain would work much the same way, but you need very little of it!
(Sorry I don’t have pics of the dark wax part, I did that at night. I just wiped it on, wiped it off.)
After it was dry I painted some extra lattice the Storm Cloud color and added a frame around the art:
The waxes took away the shiny look, but left the (toned down) color:
The size is PERFECT for that spot, and the colors work perfectly in our family room!:
I went out on a limb with that peacock color, but I’m so glad I did! I love the added pop it gives the whole thing! And I use a bit of that color in the kitchen, so it helps to tie the rooms together.
It has different looks based on the direction you look at it – more subdued this way:
But deep and rich from the other direction:
It matches the colors in that little bowl on the mantel perfectly!
I thought about sanding it down like the PB version, but it was rustic enough as it was, so I didn’t want to do anything more to it. I love mixing up styles like this – the rustic look of the art with the more contemporary rug makes this space interesting to look at but still cozy. (At least I think!) ;)
I love how it turned out – even better than I imagined! Although now I don’t know if I want to keep it there -- I think it would look awesome in the basement! But for now it’s staying. :)
The PB version is 22.5 inches square and $150! My version is 26 by 36 inches and cost me $15 in wood (I had most of it already):
Not bad, eh?? I love this because you can customize the colors to work for your space so easily!
This one did take me some time – figuring out the layout went pretty fast, it was the painting that took a couple hours. It was nice, mindless work to do while we watched the Colts (win!!) yesterday though.
Don’t forget our fall linky parties kick off tomorrow at Layla’s place! For more info go here.