Friday, November 30, 2012
I Can Breathe!
I now know more about family systems theory than I ever triangulated through emotional multigenerational thought processes.
Would you like to come over so I can psychoanalyze all your problems and blame them on your lack of differentiation?
No? Okay, good, because I'm kind of ready for some fusion.
I am now officially on Christmas Break!
And I now officially have only FOUR more classes before I graduate! FOREVER!
Of course, I could go for my doctorate.
Hmmmm.
Ummmm, NO!!!
I will be done. DONE as in done, DONE!
Ready to put my big girl panties on become a real, live social worker.
Cheers! Blog posts of substance coming soon to a blog near you!
November in review!
Happy Friday to you! (And you!) It’s time for another month in review here at TDC, just to catch you up on any projects you may have missed this month. This is the part where I always say I can’t believe how fast the year is going by…sooooo, holy canoly, I cannot even believe how fast the year is going by!! ;)
I finished up the massive built ins last month, so I kicked off November by sharing how an old accessory got a quick redo with chalk paint for the bookcases:
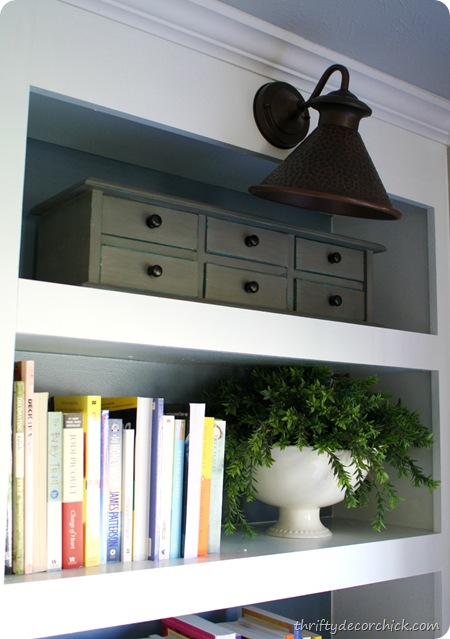
That little set of drawers has been hidden away for years, I love it now!
We announced our annual Holiday Home linky parties here:

I’ve been working on my mantel to share next Tuesday! Can’t wait to see you at Layla’s!
I shared about our holidays, debt free, in this post:

Yeah, that’s me and Dave. I was stupid giddy about that. :) I haven’t gotten to all the Financial Peace winners yet – some, but not all. The not-so-tiny mouse problem we had this month has taken more time than I thought, but you’ll hear from me this weekend for sure if you are a winner!
I explained more about the accessories I used on the bookcases and the methods I used to decorate them here:
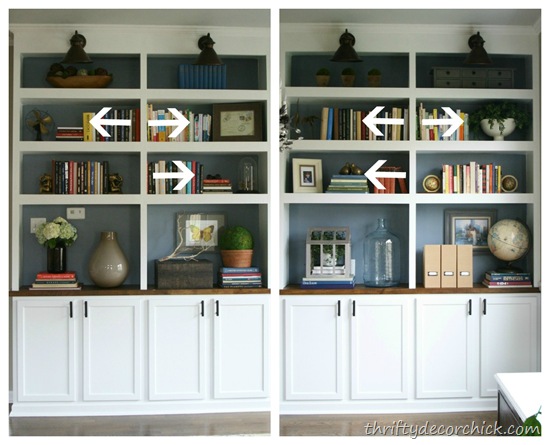
Accessorizing is way harder than it looks – I struggle with it every time!
I’ve been thinking about Christmas for months weeks already, so I shared a few of my favorite advent calendars in this post:
I love this one especially! So cute and no small toys – bonus. ;)
We did some switching around and got rid of a couple things so that I could turn our loft into my “new” craft room:
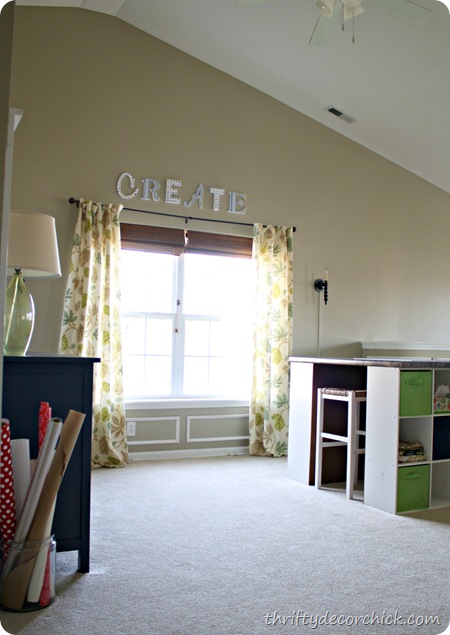
I’ve already used it that craft table more in the past couple of weeks than I have since I built it months ago! I love this bright spot!
The safety stuff in our homes isn’t glamorous, but we need to think about it. I shared what we do in our home here:

It’s the stuff that puts my mind at ease, at least a little!
I shared a personal story in this post about why home is so important to me and your responses were just lovely, thank you so much. They really meant so much to me.
Over the Thanksgiving weekend I finished up my tried and true outdoor decor:

Can I just say that outdoor timers are worth their weight in gold? Even more when it snows. :)
I shared a couple tips to finish up the month – how to make a rug that’s too big work for your space:
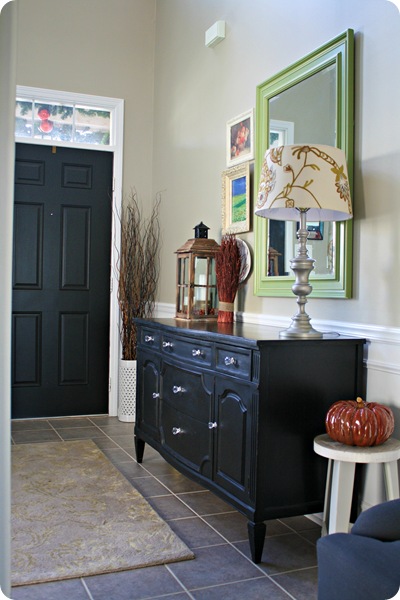
And how you can get a HUGE rug for a fraction of the cost. :)
I showed you how I planned out the floor plan for the new basement furniture here:
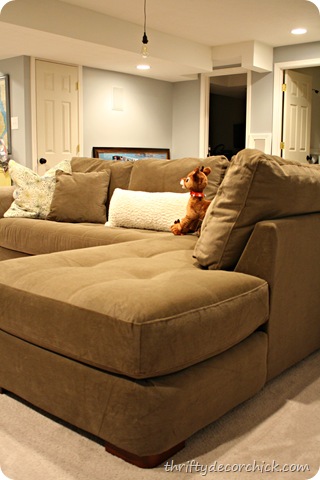
It’s so nice to have a place to sit down there. :)
You all shared more than 140 beautiful foyers and mud rooms in this month’s Show Us Your House party here. So much inspiration for tiny to big entryways!
And of course there were TONS of amazing projects linked up at the Before and After Party! You can see all 400+ of them in this post.
Don’t forget to link up again this Monday morning for the last Before and After linky of the year! Here’s the code for the button if you’d like to get it added to your post now:
<div align="center"><a href="http://www.thriftydecorchick.blogspot.com/" title="TDC Before and After" target="_blank"><img src="http://www.homestoriesatoz.com/wp-content/uploads/2012/03/beforeAndAfterButton_thumb1.gif" alt="TDC Before and After" style="border:none;" /></a></div>
On a different note, I’ve been trying to get back to questions I get in comments on each post on a timely basis. TRYING. :) So if you’ve asked a question about a project in the comments I plan to have them answered by the end of each week (if not sooner). If you if have an email attached to your account I can just respond when you comment, but I know others may want to know the answer too.
Have a lovely weekend!! My goal is to get the rest of the Christmas decor up by the end of day December 1st. Well, at least 90 percent of it. I always say this, and it never happens. But I’m saying it again…maybe this time it will work. ;)
Have you finished? Started?
Thursday, November 29, 2012
How I space plan (and a basement sofa!)
Hello there! How are ya? Today I’m sharing a little more progress on the basement, in the form of furniture! Yahoo!!! Before, when we used the basement unfinished (which we did all the time), we had a couple chairs and an old loveseat down there. The chairs were comfy but the loveseat was not, and it was small. I hated that we could never sit together.
When we finished the space my main goal was to make the family room area as big as possible. Our upstairs family room doesn’t allow for much seating so I wanted the basement to have plenty of space to sit and lounge, but still have tons of floor space for the kiddo to play too.
So you know how you think you want one thing, it goes all wrong, and then you realize after the fact that it was for the best? Well that’s the moral of this furniture-for-the-basement story.
It was a long process – it started back in July when a friend was shopping for a new sectional. She was looking for inexpensive but big, and this one from Value City fit the bill:
I went with her to check it out and really liked it. (This one is called the Solace by the way.) I wanted a more contemporary look for the basement, and this was perfect. And this thing is a BEAST. I mean, huge. JUST what I wanted!
I measured our stairs, the landing on the stairs, the ceiling height, everything (I thought…), and figured out that we’d be able to get it down there…which was kind of important. ;)
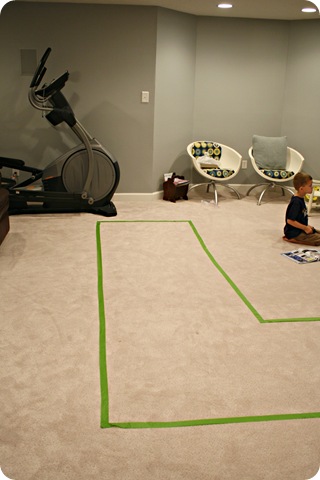
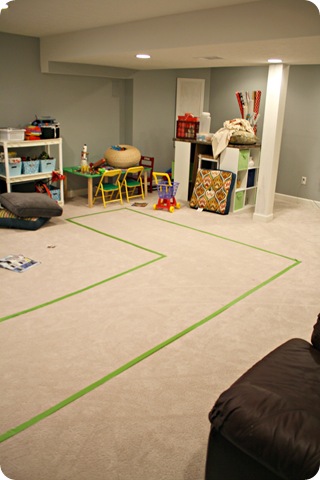
And then, because it’s was so big, I wanted to make sure it would work in the actual room. So I grabbed my trusty FrogTape and started measuring and taping, right on the floor:
I actually did this once on the cement floor too, before the carpet was installed. I was a teensy bit anxious to get a place to sit. :)
I measured it to the exact dimensions of the sectional to see how it would work. From this direction it was tight but if we moved the elliptical it would be fine.
The shorter side worked too, we’d just have a smaller walk way over there:
Most of that stuff over by the wall was being moved anyway, so I figured it would be tight, but fine.
We lived with the outline on the floor for weeks and then decided it would work and purchased the sectional. Delivery day finally came and I was GIDDY. After six months of finishing the basement we were finally going to be able to really use it!!
But alas, I was wrong. :) They didn’t even bother taking the sectional off the truck. At first it was that they didn’t think it would make it down past our landing to the basement. Then they measured the door to the basement and realized the back was too tall to fit through.
DANGUUUUH.
So I stood in the driveway and waved goodbye to my long awaited sectional.
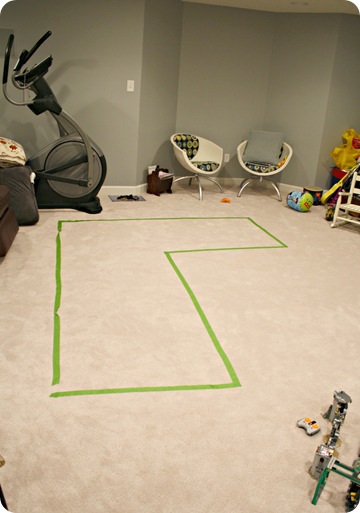
The hunt was on again and I found another one pretty quick at a local furniture store (Kittles Rooms Express). This time I measured every possible angle to make sure it would work, for real this time. It did, and it was in stock! Score! I took those measurements home and just to make sure, laid out my FrogTape again:
This one had a different configuration that I was hesitant about at first, but now I’m SO glad we went with it.
We lived with the new outline on the floor for a few weeks because we had to wait for the money from the first sectional to go back into our our bank account. And that took awhile because they messed up the transaction.
I finally went to order the smaller one and wouldn’t you know, it was out of stock. Gah. I know, I know…first world problems. There was a bonus though -- because it wasn’t in stock we got it at a big discount. It ended up costing less than some of sectionals I saw on Craigslist!
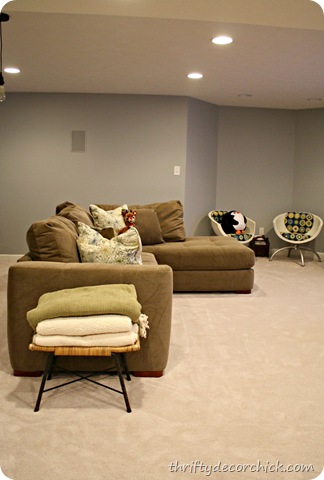
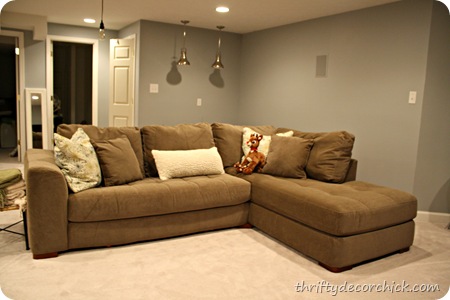
I breathed a big sigh of relief when they got it all the way down the stairs on delivery day. :) We ended up moving things around a bit and were able to move the sectional back even further in the room than we originally planned:
You can see the Goodwill moon chairs in the background. Yes, I still spin in them. :)
Like I said, I’m SO much happier with this layout – it makes the space so much more open. The first sectional would have broken up the room big time and we would have had to take a (long) walk around it every time to sit down.
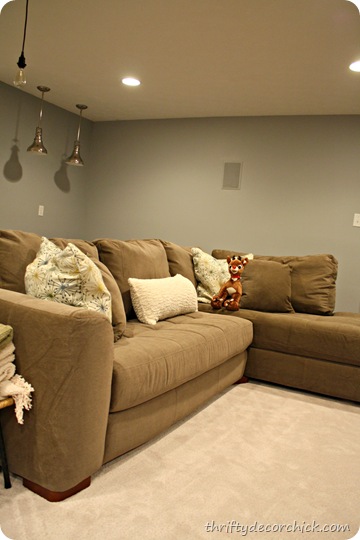
We wanted to go cheap but comfortable and cleanable for furniture down here – I wasn’t going to spend near what we did upstairs in the family room because I plan on this one getting beat up. We eat down there and I fully expect the kids to wear it out. It is microfiber, so it cleans up easily, and I must say, it is SUPER comfy:
Of course I checked out the comfiness on the tush factor beforehand but I was pleasantly surprised when we got it in the house.
The only thing I wish it had was detachable bottom cushions. I know some like having them attached but I like the option of flipping if something gets stained or messed up. The back cushions are not attached though, which is even more important to me cause I hate a wimpy cushion. This way I can flip them every month or so to keep their shape:
I found a couple pillows at TJ Maxx that I LOVE, and I’ll be making a few more to cover the ones that came with it. I’ll show you those as soon as I find the perfect fabric.
This was the first step in making this space comfy and usable for us and we love it. We are down there all. the. time. Finishing the basement is hands down the best thing we’ve done in this house. It only took us eight years to do it too. :)
There’s so many things to do still, first up is the bathroom, and next I want to focus on the bar area you can see behind the sofa:
We’ll have a sink and small fridge hopefully, and maybe a small microwave? How FUN! My goal is that we never have to leave this level if we don’t want. Except for you know, sunlight. :)
I have a HUGE project in mind for the TV wall. Huge usually means it will take me eons. I hope to hurry it along this time.
We found an awesome ottoman for a great price too, but we had a little mishap with that (read = red wine) and it’s going to need a redo. More on that soon too, at least I hope! And have I mentioned how much I LOVE all the wall space down here? So many options for art and photos, I’m so excited about that.
So that’s the story of how I space planned in the basement, bought two sectionals and finally got a place to sit after eight weeks. I’m so glad the first one didn’t fit down the stairs – now I realize it was all wrong for the room. So do you put painters tape on your floor? Have you ever bought a piece of furniture and had it not fit in the house or the space?
Tuesday, November 27, 2012
Binding to get the perfect rug
Hey hey! Whazzzzup.
OK, I’ve been meaning to post about this little tip for months and months and just…I don’t know…didn't. And then a friend told me about the rug sale at Rugs USA yesterday (75 percent off people! GO. After you read this post!) and I found two rugs (crossing fingers they work) for hecka cheap, and then another friend mentioned she was bummed she couldn’t find any runners that were the right size for her space.
So THEN I told her about this little tip and realized I need to just post about it and share it with you all!
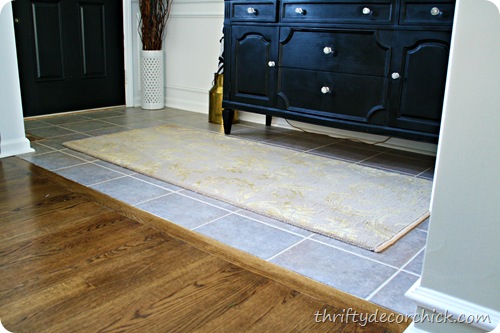
So say you have an awkward space, like our foyer that I showed you last week:

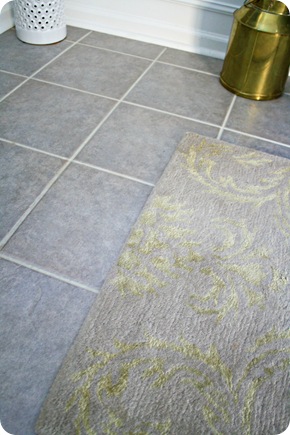
I know it doesn’t look awkward, but I’ve ALWAYs struggled with the right size rug for this spot. Before we had the buffet piece in there, it wasn’t as hard. But after, when I wanted something long and skinny, but not too long, that’s when it got harder. A 4 x 6 rug would have to go under the buffet which looked odd to me, a 3 x 5 just kind of floated around and looked weird, and a regular runner (about 2 1/2 by 8 feet) was too long.
We can’t have a rug up by the door because there's not enough clearance under it – by the way – if you are looking for a rug for an exterior door, make sure to check that. In my decorating days many a client would have to send back beautiful rugs they had searched for for weeks because the door wouldn't clear it. (Interior doors can be cut down pretty easily so it’s not as big of an issue there.)
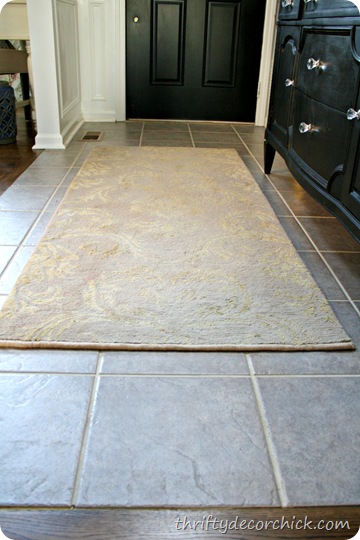
So anyhoo, last year we needed a new rug for the foyer, and my long, arduous search began again. I finally found a runner I liked at Burlington Coat Factory:
It was too long though, so I decided to try out a little trick I had learned long ago.
Did you know you can have rugs cut down and binded to fit your space?:
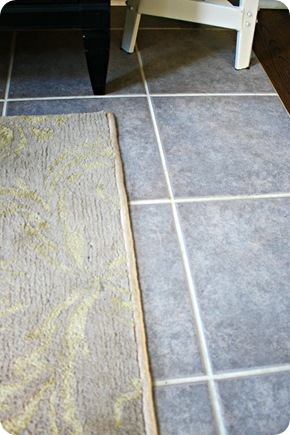
Mine was eight feet, so I had two feet cut off and the one edge binded. I took mine to a local carpet store to do it. It’s been so long I can’t remember what the cost was, I think $30? My rug was a steal so it was worth it to me to do.
And I’ve seen that you can do this on your own, but I’ve never attempted it. If you have, let us know!
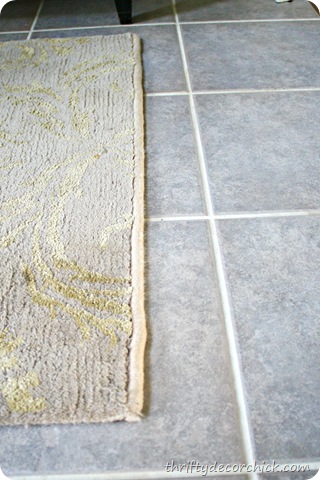
Only thing is you need to be specific with the carpet folks about the kind of binding you want. They did mine so that the “new” end looks different than the other:
I was going to take it back but then later decided it’s not a big deal. No one but me notices it. And you know if they did…THEY’D GET A COOKIE.
I think it’s cheaper to have it done another way, where they kind of use the fabric stuff to close off the rough edge, instead of the thick thread. I know that probably doesn’t make sense, but look at some of your rugs and you’ll see what I mean.
Or not. ;)
So anyway, be specific about how you want it to look. I wasn’t.
But now we can open our door and have a spot to wipe our shoes – both good things:
The other great thing about this is that you can pick up carpet remnants from store and have them bound as well – so if you need a huge rug and don’t want to spend $1,000 and up, check out the remnants and have them bound! (Remnants are usually a fraction of the price of the carpet off the roll.) This is also great when you need an odd sized rug – say 10 by 14 or something like that.
Awesome eh?? I like it, I do.
Just do a web search for carpet stores or carpet binding near you and I’m betting something will come up.
I think picking out a rug is just about one of the hardest decor decisions to make – it’s usually an investment, it is a BIG statement in the room so it has to be the right color/design and it can be hard to figure out the right size.
Rugs USA has extended their 75 percent off sale by the way – check it out here. My charcoal rug in the family room is available here too! And no, I’m not being paid to tell you this, it’s just an AWESOME sale. :)
Monday, November 26, 2012
Festive outdoor decor
Hola! How was your holiday weekend? Great I hope! Ours was lovely – got plenty of time in with the family, did some holiday decorating (still tons to do), saw a GREAT movie (Rise of the Guardians – amazing) and just enjoyed being home. (Thanks so much for your wonderful comments on last week’s post by the way. They meant a lot to me.)
I actually started the outdoor decor last weekend when it was nice and warm, but I finished it up on Saturday by getting more lights up and filling in the window boxes.
I do pretty much the same decor outside every year because I found something that works (and that I LOVE) years ago and I just keep going back. There’s a few tweaks year to year, but not much.
Since I do the same thing every year, I’ve got it down to a science. It takes me very little time to get everything up and festive. And perhaps more importantly – it’s easy to take down! :)
The window boxes were filled with greenery from the grocery store – a bundle was $4. Instead of just sticking them in as they came (which wouldn’t fill up much), I cut them down into smaller pieces and stuck them in the soil:
There’s fir, white pine, boxwood (and one more, I can’t remember the name of it! The droopy stuff.) in each bundle. I grabbed some red sticks from the hardware store (later found them for even cheaper at a nursery!) and cut each one in two to make them go further.
I used to hang wreaths on our front windows, but a few years ago I started hanging them on our shutters instead. This is the part that takes longer than anything else but I love the look so it’s worth it! And it was super cheap too – I got the four wreaths years ago for I think $2 each at Joann’s, then the ribbon is just the cheapy red stuff you can get anywhere:
I had extra upholstery tacks from this project so I just used those to put them up this year. Sometimes it’s thumbtacks, sometimes it’s nails. Whatever is handy. ;)
I love how the red ribbon and green looks against the brown shutters! (Yes, they are a gray/brown, not blue. They always photograph blue.):
We have a teensy tiny front porch but I do it up BIG this time of year. I frame out the front part and the door with greenery, then just stick the lights in:
I used to wrap the lights around the greenery, but the first time a strand of lights went out I realized that was for the BIRDS. I just smoosh them in there now, using the greenery to hold the strands where I need support.
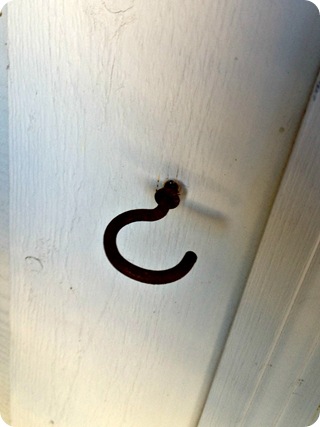
Putting up the stuff takes not time at all anymore – I reuse my big cup hooks every year and screw them into the same spots:
Then I just hook the greenery in and they stay put!
The porch makes the biggest impact and takes no time at all. I even keep the little swags of ornaments attached so I just put them up and I’m done:
A couple years ago I wound red ribbon through the greenery, which was beautiful -- but more time than I wanted to take on it this year.
The wreath is two put together – a flatter, white pine kind of wreath and a red one from Target clearance years ago on top. I have an idea in mind for a different kind of door decor, we’ll see if I can get it done this year.
Of course I love it best all lit up at night:
I plug everything into a outdoor timer so I don’t have to think about it again till the week after Christmas. That is, unless a strand goes out. Knock on wood…
I always plan on doing luminaries or lanterns down the steps, but I never seem to get to it. So much left to do, like our big honkin’ tree inside!
I love that the greenery and wreaths still make it look festive during the day and when the lights aren’t on:
And I love how the landscaping lights highlight our cool shutters. (I love our shutters!):
Of course I have to add some fun for the kiddo too – the red lights on the bushes are big round balls that look like Rudolph’s nose. :) (From Target two years ago I think?)
And we still have to get the big lawn inflatable out too…yes, we are one of those houses. But the Bub LOVES it, so as long as he’s into it, we’ll put it out every year.
It’s beginning to look a lot like Christmas, can you believe it’s that time already?? I’m starting to feel the mushy, gushiness I feel every year when we pull out the decor. I love it! I’m a traditional girl at heart, especially at Christmas, and the front of our house reflects that:
When do you put your decor out, if you do anything outside? Are you inflatable people like us? ;) Or do you put a wreath on the door and call it done?
Sunday, November 25, 2012
Family, Friends, Faith, And . . .
Giving thanks for family, friends, and faith.
And photos of precious kids that arrive in seconds via phones.
And sleepovers with lifelong friends.
And the crafting of a new stocking.
And the crazy fun of Black Friday (and children who think they get that day off school because it's a National Shopping Holiday).
And a little boy who passed his swimming test and was finally able to go off the diving board (the first time he jumped, the second he belly-flopped, and the third he made a perfect dive).
And of course, I am very, very thankful for peppermint mochas!
And daughters to share them with!
"In everything give thanks: for this is the will of God in Christ Jesus concerning you."
~Thessalonians 5:18
Thursday, November 22, 2012
Home decor giveaway!
**This giveaway is now closed. Winners have been contacted via email.
Well if you’re like me you’re still in a food coma and laying in bed a little extra longer this morning. But if you’re like some of my friends who go out at 1 a.m. (2 a.m.? 4 a.m.? I have no idea, I’m sleeping then) then you are just getting home and going to sleep now.
I much prefer the sleeping in and lounging bit, but either way I’m pretty positive you’ll love shopping from your computer no matter what. I promise you’ll find something you love at Decor Steals:
This is one of my very favorite deal-a-day sites! Unlike many of the others, this one is all decor, all the time and it’s all at an incredible price (up to 85 percent off of retail). My kind of place!! And today marks their third birthday – awww, so sweet!
Here’s a few of my favorites that you’ve seen lately or will see soon at DS!
It’s hard enough to find a pretty wood tray, but to find one that’s round and so ornate?:
Those would look SO cool hanging on a wall in the kitchen too!
I’ve said it before and I’ll say it again, one of the reasons I love this site is that you’ll find items you’re friends won’t have in their house. (OK, unless your BFF shops them too, like one of mine.) ;)
These angel wings are so unique!:
How beautiful would those be for Christmas?? Maybe spray painted even, or gold leafed? Gorgeous!!
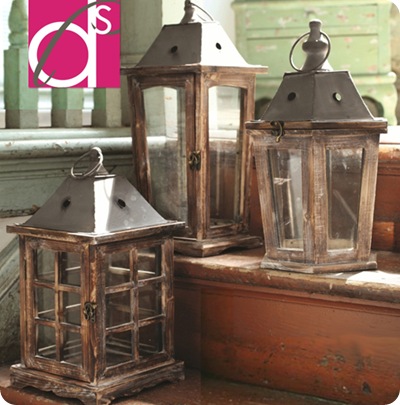
And they never disappoint with items that look like they would have come from a certain “Barn”:
These look so similar to what I see in the catalogs! (For a fraction of the price of course.)
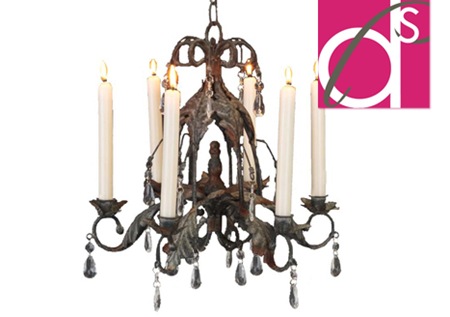
I have a thing with candelabras. I use one over our tub in the bathroom and also outside under our pergola and both are from Decor Steals! It is SO hard to find pretty ones. Stores don’t carry them and most online sources carry really basic versions.
I love this French-inspired candelabra from DS:
Isn’t that lovely?
I love what my friend Marian did with the beautiful mercury glass candleholders from Decor Steals:
Just stunning!!
And I am just giddy about their Black Friday deal – live preserved boxwood wreaths!:
I’m kind of obsessed with the idea of boxwood wreaths this year and was planning on using them in a spot anyway, but they can be SO expensive (usually at least $50 each). These are $29 each and I’m grabbing one!
The deals start at 10 a.m. EST each day, so grab them while you can! They usually have extended deals where you can catch items for a few extra days too.
This weekend Decor Steals is celebrating Black Friday by giving away $100 in credit to one of you, and three preserved boxwood wreaths to three more of you! YAY!! Let the holiday decorating begin!!
Here’s how to enter to win $100 in credit to Decor Steals or one of three boxwood wreaths:
1. Leave a comment here. What did you eat for Thanksgiving? OK, what didn’t you eat for Thanksgiving? ;)
2. Visit Decor Steals here and check out their pick steals tab. Which item do you want to see offered in the future? Come back here to let us know in a comment.
3. Visit their Facebook page and “like” it here OR follow them on Pinterest here. Let us know you did in another comment. (If you already do, just let us know!)
4. Subscribe to their email list here (you’ll get notices about the new deals) and if you do (or are already on the list), leave one more comment here.
* You can enter one, two, three or four times – it’s up to you! All options are not mandatory to win.
* Remember if you comment anonymously or you have a private blog, please include your email address in each entry, and spell it out with “at” and “dot” to avoid any spammy emails coming your way.
This giveaway is open to the contiguous US only. It will close this Monday, November 26 at 9 a.m. EST.
I hope you have a lovely holiday weekend! I’m off to eat some pumpkin pie for breakfast.


![beforeAndAfterButton_thumb[1]](http://www.homestoriesatoz.com/wp-content/uploads/2012/03/beforeAndAfterButton_thumb1.gif)

