Wednesday, October 31, 2012

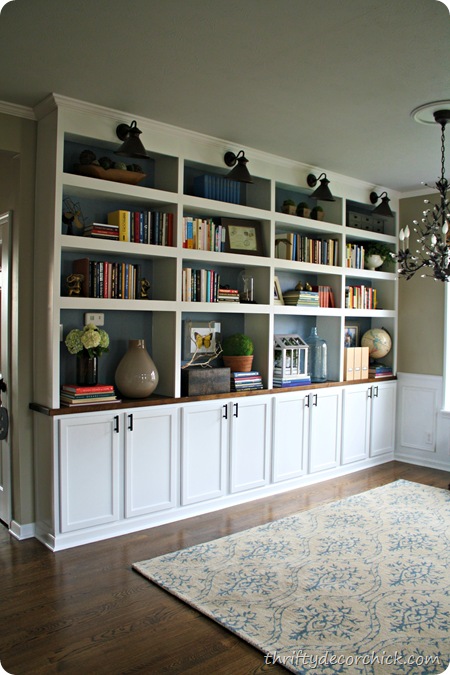
Library bookcases done. Boom!

Remember that one time, back in January, when I had that idea to transform our dining room into a library? And then, back in March, when we started the process of building bookcases for the new library?

Yeah, it was eight months ago, so I don’t blame you if you can’t remember. ;) Well, they are finally done!!!! And I’m thrilled!!

I have worked  my butt off over the past few days to get them done. Seriously, my butt should be a third of it’s size.

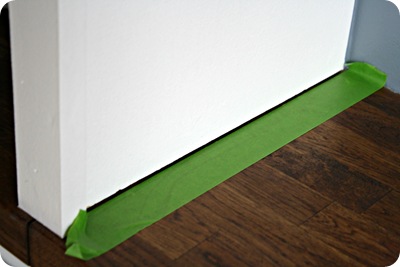
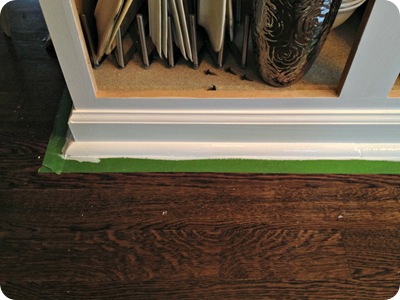
There was so much to do to finish up, I didn’t realize how long it would take. There was a TON of painting – I had done one coat of primer on the bottom cabinets before, but then I dropped a can of blue paint that splattered all over them (fun times) and I got a recommendation to use an oil-based primer instead anyway (more on that later). So, I reprimed the cabinets and taped off the baseboards and cabinet trim with my Frogtape:

I did one more coat of primer and two coats of semi gloss white paint.

I primed the cabinet doors and then sprayed them with the semi gloss two times:

The finish is impeccable! I’ll show you more of that process soon too!

I used a TON caulk. It was insane. I used this trick I saw on a DIY show. Or maybe it was a blog? Pinterest? Who knows anymore!:

And found an awesome tool that helped this process immensely that I’ll show you soon too!

I installed the crown molding in the room and caulked the top and bottom of that:

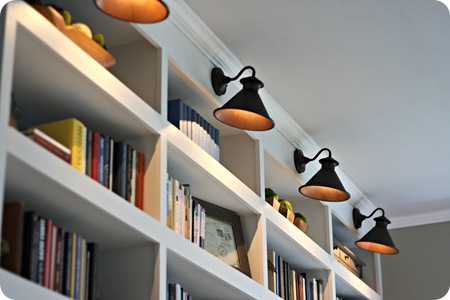
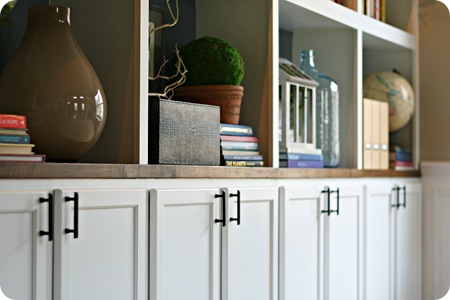
I originally picked out hardware that was a nickel finish, but I realized after I got the lights in that I wanted the hardware to match it, so I went back to Home Depot and picked these out:

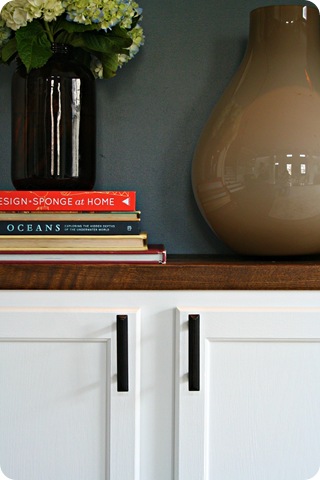
I love their clean lines – they say “library” to me:

oil rubbed bronze cabinet hardware

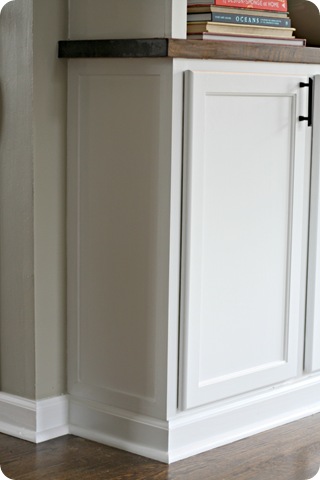
I installed some lattice wood on the side of the cabinets just to add a little detail:

trim on side of cabinet

And THEN I could really start decorating the shelves! I’ve had most of them (mostly) done for awhile now, it was those taller shelves on the bottom that were hard:

dark bronze cabinet hardware

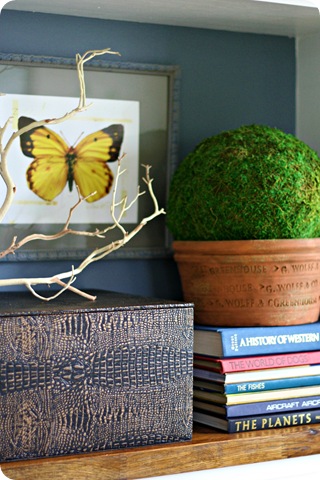
Sometimes accessorizing is the easiest thing and everything just falls into places nicely. Sometimes it takes FOREVER to get it right. These took for.ev.er:

accessorizing bookcases

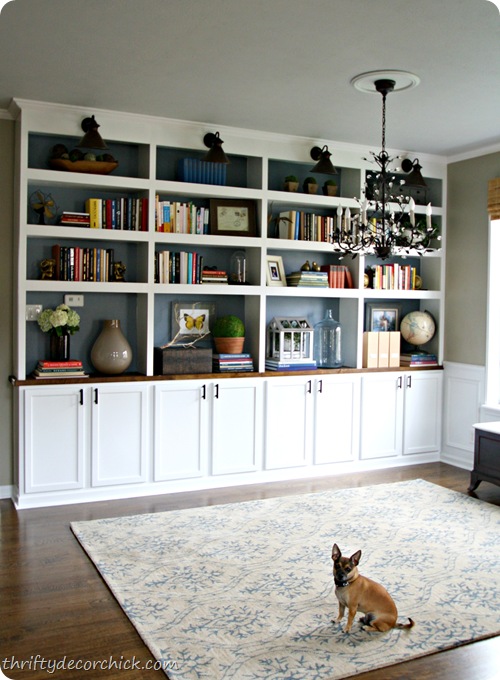
I’ll share more detail on all of the accessories soon, but for now, let’s just enjoy the final result shall we?:

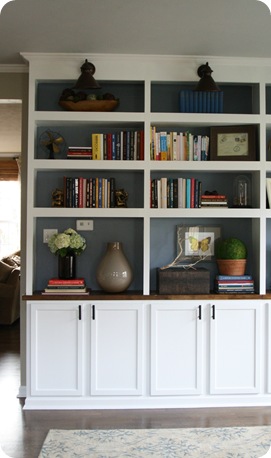
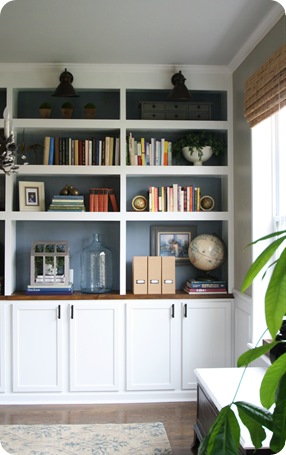
DIY built in bookcases

The dog likes it too. I swear I don’t stage him like that – our animals are just obsessed with being in each photo. I had just shooed the cats out of the shot. ;)

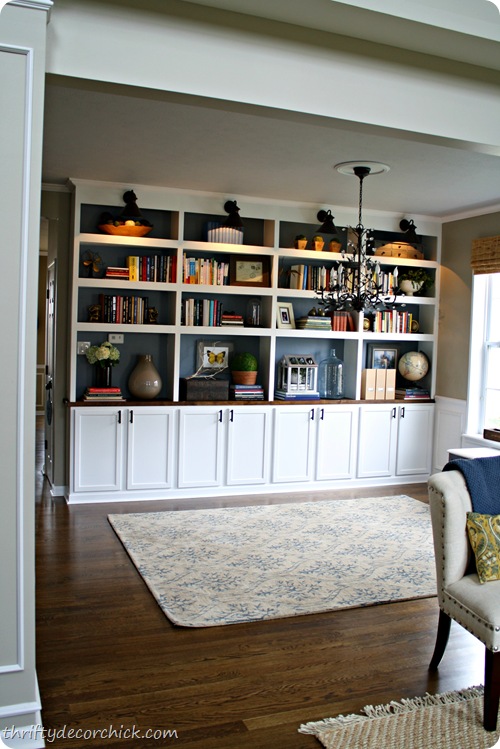
I know I say this a lot, but they turned out EXACTLY how they looked in my head. I really don’t think I could be happier:

DIY built in bookcases with cabinet bases

I love how the shelf spacing turned out – we made the bottom one bigger because we had to deal with the light switch and thermostat. We have a ton of bigger books that I wanted to have room for on the bottom, but I ended up laying them all flat anyway. ;) At first I was a little nervous about the bigger bottom shelf but I really like how it came together.

By the way, we asked two heating and cooling guys about the thermostat – I thought we’d have to move it. They both said it’s fine as is, which was a nice surprise. I’m even more surprised that they don’t bother me much. I hardly notice them.

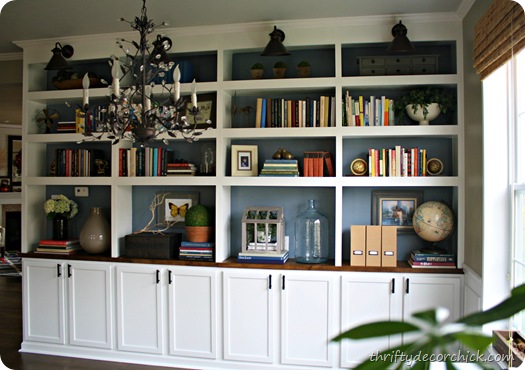
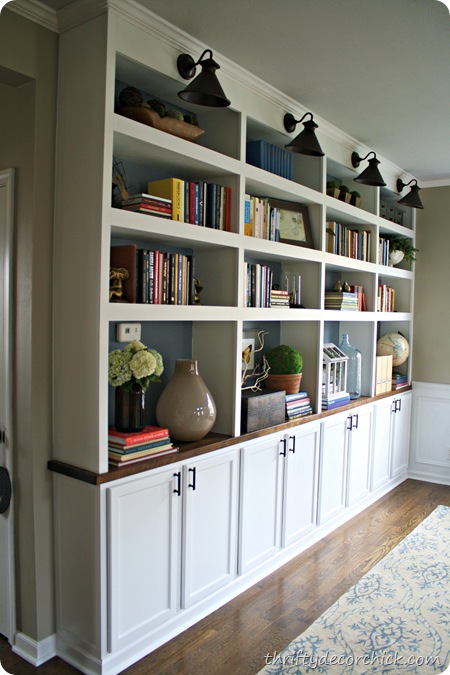
We have a column in the room that prevents a good straight shot of these, so here’s a couple that show more detail of the bookcases:

DIY built in bookcases DIY built in bookcases 

I didn’t want to lose much floor space in the room, so we used upper cabinets for the bases – they’re only 12 inches deep. It worked perfectly – I didn’t want the shelves to be any deeper than that:

DIY built in bookcases butcher block

The cabinets were just the unfinished kind you can find at most big box hardware stores. Even at 12 inches deep they hold a TON! I’ll show you that soon too! ;)

Obviously it took me waaaay longer than I thought it would to build these. I’ve never done something this large. Dad helped me a TON by coming by a day or two a month to help me create them -- but I otherwise it was (mostly) me. We had help on one part – adding the trim to the front of the shelves.

Now I can’t wait to get moving on the rest of the room! Most of it won’t be too bad – I’ve had a new light sitting in the garage for months (this one is too ornate for what I’m going for in here – it’s moving elsewhere). The drapes won’t be too hard (just have to find the perfect fabric!). I’ve already got a coffee table that will go in the middle of the room that will get a redo.

The chairs are going to be the biggie – finding four, super comfy, pretty, affordable chairs will be interesting. :) My plan is to put the coffee table and four chairs in the middle of the room for another comfy spot to sit:

DIY built in library bookcases

We never ever, I mean, never used the dining room. Ever. I do think a dining room table would look lovely in front of the built ins, but I just don’t want to go back to a space that we don’t use. For now, the chairs are the plan!

Since I’m obsessed with before and afters, let’s take a look at the room earlier this year:
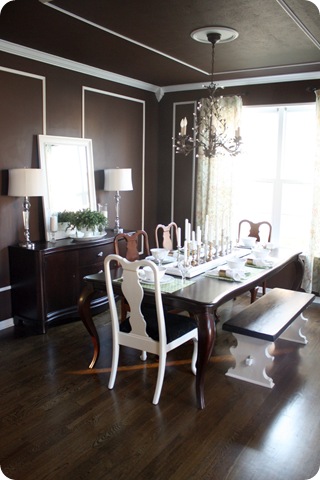
chocolate brown dining room

This was a result of my dark and dramatic phase. ;) I really did love this room, but when I painted it chocolate brown the floor was light carpet. The addition of the hardwoods made it feel like a cave.

I’m so thrilled to have a much brighter, useful room now!:

DIY built in bookcases

And for all that is good, I am SO GLAD this part is done!!! :)

Can I get a WHOOOOO??

Thanks so much for coming along on this ride with me – and thanks for your patience. I hope you love them and are inspired!

For more on this project, check out these links:

We started out with adding toe kicks to the cabinets and fitting them in place here.
I pulled down all the trim in the room, had the lights and outlets wired (we had help on that too) here.
I installed and primed the cabs, painted the walls (twice, ugh!) here.
I showed you how we built the bookcases (frame and shelves) here.
The trim was added and shelves beefed up here.
And finally, the library light drama was covered here.

Whew!! MAJOR props to my Dad for all the help, and my hubby and son for being patient with me for the past few days so I could get ‘er done!

Now I’m off to create a new Halloween costume for a cute little boy. The ninja now wants to be the Headless Horseman and I’m determined to make it happen. And then…I’m taking a nap. For a few days. ;)
Monday, October 29, 2012

RX For Weariness

When I woke up this morning I thought of my long to-do list.  It was exhausting just thinking about it.  The word that came to mind was "weary." 

Before dragging to the shower I took a moment to read Sarah Young's daily devotional, Jesus Calling.  Today's entry seems meant for me. 

I hope it will also encourage you on this Monday morning.

"Linger in my presence a while.  Rein in your impulses to plunge into the day's activities.  Beginning your day alone with Me is essential preparation for success.  A great athlete takes time to prepare himself mentally for the feat ahead of him before he moves a muscle.  Similarly, your time of being still in My Presence equips you for the day ahead of you.  Only I know what will happen to you this day.  I have arranged the events you will encounter as you go along your way.  If you are not adequately equipped for the journey, you will GROW WEARY AND LOSE HEART.  Relax with Me while I ready you for action." 

Just reading those words changed my outlook.  After I got the kids to school I spent time in prayer with a friend and felt renewed.  What a wonderful reminder of self-care and the importance of focusing on HIM, in all we do.  This is especially important for mothers!


Coming soon to a blog near you--an update on Mei Mei!

DIY wood tray (& overcoming tool fears)

Hello all! First off, I hope everyone on the east coast is staying safe and dry today!! We are praying that everyone comes out unscathed and the weather isn’t as bad as they are expecting!

Well I’ve been working my booty off this weekend peeps! I have worked SO hard on finishing off the bookcases – my body is screaming at me but I am so stinkin’ excited. I WILL show you this week, even if it kills me. OK, that’s extreme. Even if it makes me really tired. ;)

Just a couple more things to finish up, and then to decorate the things. I’ve had stuff on them for weeks now, but not really how I want them to stay. Sooo…the reveal will come this week, but it may be a couple more days.

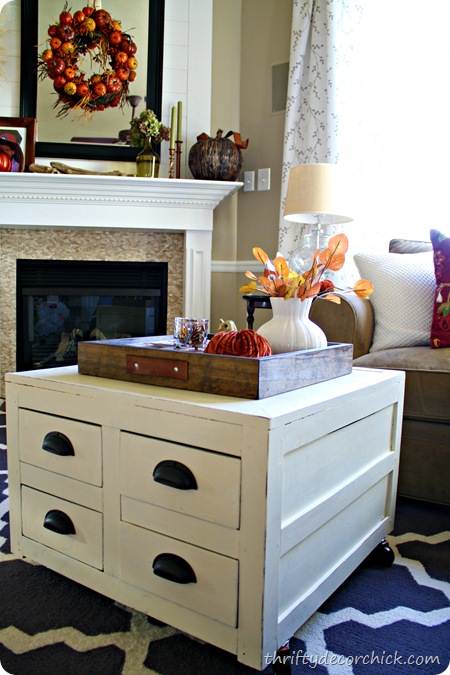
Anyway, I continued the DIY from the weekend and finished up a project this morning that I started a couple weeks ago. After I painted the coffee table to a pretty white color, I knew I wanted to add a little somethin’ to it – a wood tray for the top. Now I’m not really a decorate the coffee table kind of girl – I try and then inevitably the surface ends up covered with mail and paper and Legos.

But I thought adding a tray would be a nice in between – it would keep the Legos corralled and would be pretty at the same time. I shopped around a bit for a tray the right size, and found one for $20 at Target – it was the perfect size, but I didn’t care for the design and I really didn’t want to spend $20 when I figured I could make one myself.

See, I had all the wood I needed in the garage. Thing is…I had to overcome one of my tool fears to make this happen. I would have to learn how to use the circular saw.

Dun dun dunnnnnnnnnn.

I’ve never used one because, well, they scare me. :) But when I thought about it, I realized it was silly when I was thisclose to a pretty (free!) tray – I knew I needed to overcome my fears.

So I took a trip out to my awesome True Value and took a look at their power tool selection:

I was a little overwhelmed but quickly knocked out the bigger options – I wanted my saw to be as small as possible because for me small = manageable. And then when I saw there were cordless options I was sold! That is because one of the biggest fears I have about circular saws is accidentally cutting the cord and electrocuting myself. For real.

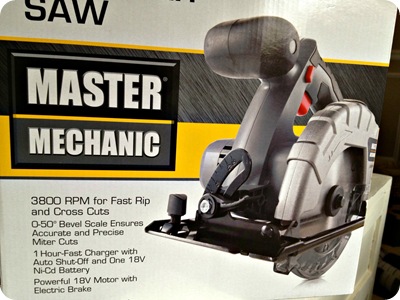
So I landed on this one:

master mechanic saw

Master Mechanic is the True Value brand (which I didn’t realize till they told me that day) and I have been really pleased with this brand so far – the drill I bought last year was the same and I LOVE it.

I can’t remember the cost, but it was way less than I thought I was going to pay – I think it was $60. The blade is pretty small, but plenty big to handle the items I’ll be cutting. And my favorite part of course is that there’s no cord – it’s battery operated:

master mechanic cordless circular saw

So I charged it up, set my wood up on saw horses, and had hubby hold the end of the wood as I cut it.

Umm…I’m hooked. It was FUN. Fun in the I’m a DIY kind of girl and love power tools kind of way. If you’re not like me it may not be as exhilarating. ;)

DIY wood tray

I didn’t take pictures of this part just because our hands were full and I wanted to focus on using the tool. I will say it was SO much simpler than I thought it would be. And the safety features made me feel much calmer about using it.

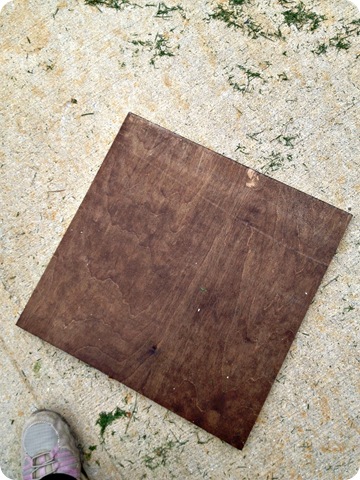
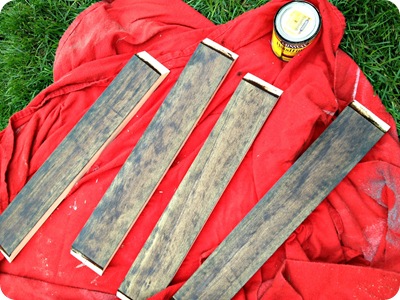
You can see above that I went ahead and put a couple of coats of dark walnut stain on it before I moved on.

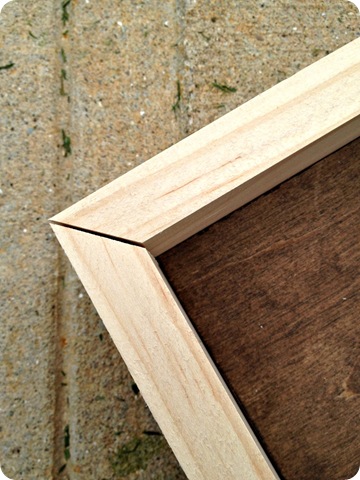
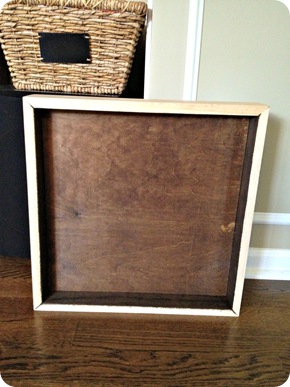
Making the tray was so simple – just the bottom piece, and then the edges (again scrap wood I had):

DIY wood tray

If you aren’t great with mitered corners (where they meet up at an angle like that) you could just butt them up to each other – when it’s done you would hardly notice.

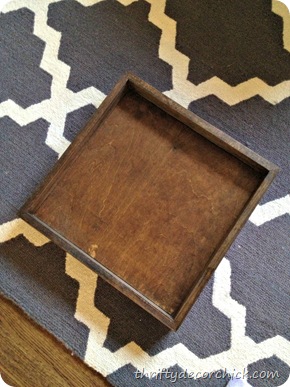
I fit them all together first to make sure the worked before I nailed them into the square base. Oh, and I stained the insides of them as well:

DIY wood tray

I wanted to stain all the inside parts first so the stain wouldn’t gum up in the corners. I can’t remember why I didn’t just go ahead and stain the whole thing before I put it all together, but I’m sure I had a good reason. Whatever. ;)

There were just a few more parts to stain:

DIY wood tray   DIY wood tray

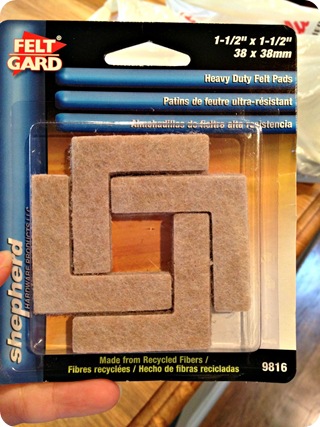
I picked up these felt jobbies while at TV to add to the bottom:

I use these things on everything! This keeps the wood from scratching up surfaces underneath.

The tray sat mostly done for a couple weeks till I finished it up this morning. I knew I wanted to add handles, and originally planned on installing regular cabinet hardware to the sides. Then I thought it may be cool to use some thick rope instead, but it was so thick I couldn’t tie a knot in it to secure it.

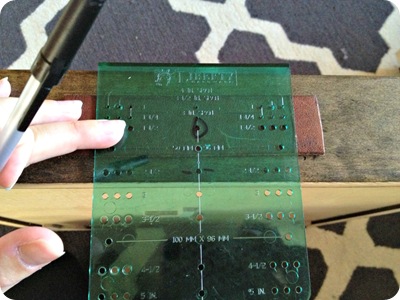
So I came up with another idea this weekend and I LOVE how it turned out! I grabbed one of my old belts (I haven’t worn a belt in years!) and cut two strips out of it. I used my cabinet hardware tool to determine where the holes needed to go:
installing hardware

Then just drilled through the belt and the wood for the screw:

I wanted to use something a little prettier than a screw, but couldn’t find anything in my stash that would work. I just used some flat end screws I had (they don’t have the pointy ends):

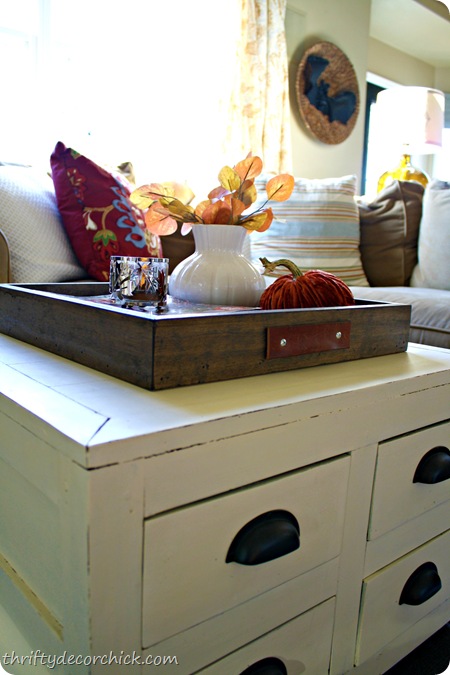
decorating the coffee table

I was going to cover the screw heads or at least put some Rub n Buff on them, but I really don’t mind them at all, at least so far. I kinda dig the look.

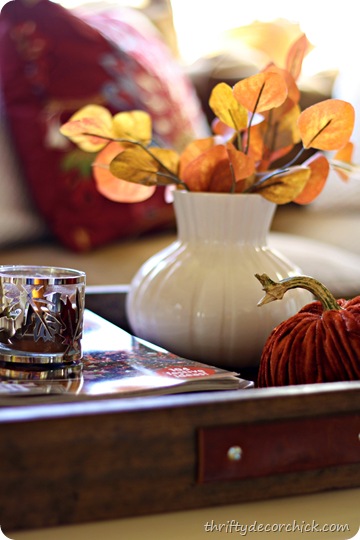
One of the reasons I love this coffee table so much is the drawers that hold all of our remotes and pens and coasters. Since that stuff doesn't normally stay out I was able to pretty the tray up a bit:

decorating the coffee table

I just put some of my magazines and catalogs in there with a few other pretties.

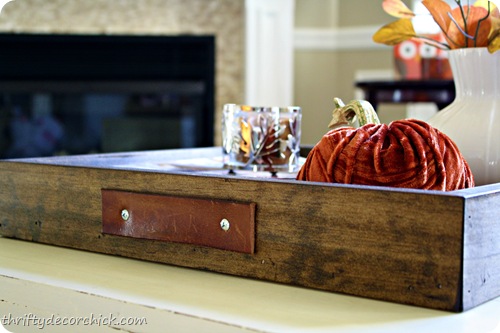
The “handles” work awesome – and they’ll stretch out more as we use them. I love how the combo of the leather with the dark wood against the light table:

DIY wood tray leather handles

And honestly? I think I may try keeping this stuff in there – it may prevent us from using it as a dumping zone. A girl can hope. :) And with the added handles, it’s easy to just take it off for Lego play.

I love how it came together and love even more than it didn’t cost me a dime! It’s exactly what I wanted for the table and this space:

DIY wood tray leather handles So do you decorate your coffee table? Or does it stay cleared off just so you can fill it with clutter like me? It sure is nice to have this surface pretty and organized – we’ll just see if it stays that way. I’ll let you know. ;)


I was one of the bloggers selected by True Value to work on the DIY Squad. I have been compensated for my time commitment to the program as well as my writing about my experience. I have also been compensated for the materials needed for my DIY project. However, my opinions are entirely my own and I have not been paid to publish positive comments.

Friday, October 26, 2012

Your Beautiful Bedrooms!

Well hello there and welcome to the weekend! :)

I’m bragging on a few of you today – I went through the latest Show Us Your House linky and could not believe all of the beautiful bedrooms! I seriously had to stop adding pics – it was so hard to narrow this down!

SO many pretty spaces and great ideas – let’s take a look at a few!

I think I caught my mouth hanging open when I saw Kristin’s beautiful space:

yellow gray bedroom

She did such a great job at making this a cozy space, even with the cooler, lighter colors.

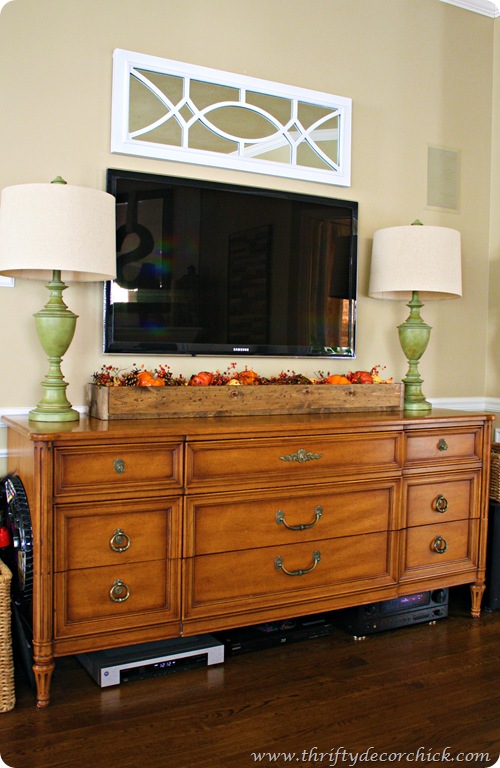
And I LOVED how she worked her TV into the decor so I had to share that too:

art around TV

Brillz. The layered look behind the TV is awesome. So doing this.

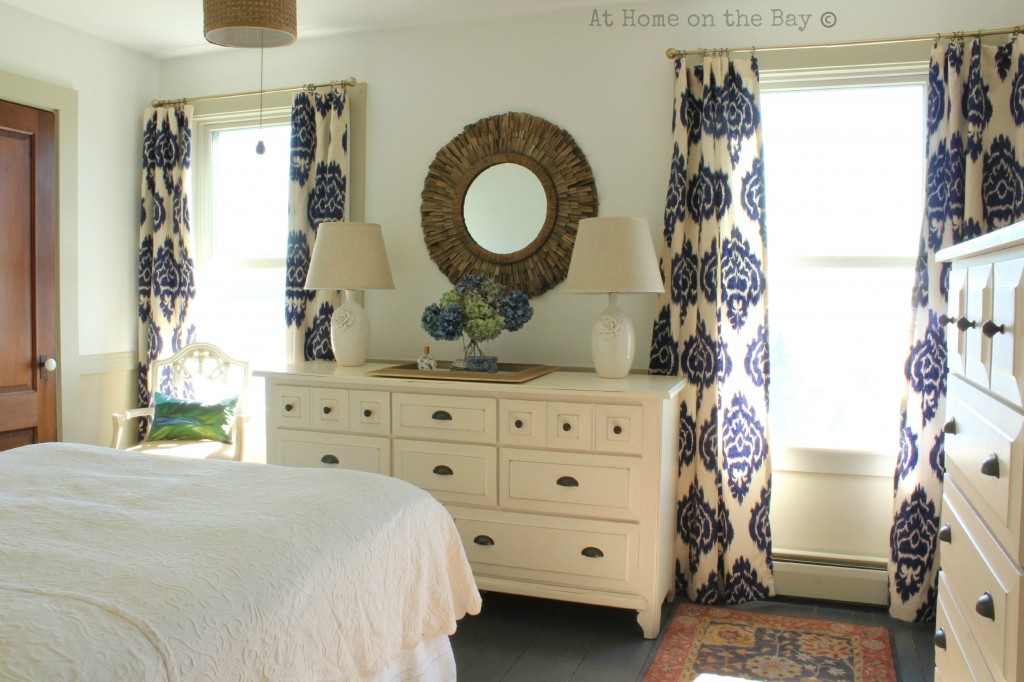
I think I may have shared Mary’s awesome drapes before, but take a look at them in this room!:

stenciled drapes

So pretty! That mirror and the lamps paired with the beautiful hydrangeas are all gorgeous. You can see more of her space here.

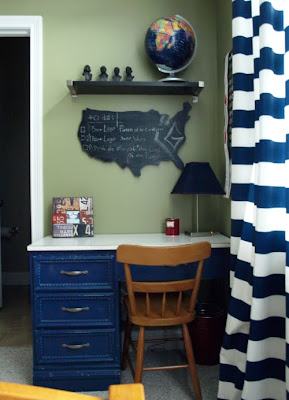
I love this teen room Julie created for her son:

Pottery barn chalkboard knock off

And I LOVE that chalkboard knock off they made! I think boy’s rooms are especially hard, so I love sharing boy room ideas. :)

I am so into deep, rich blue lately – and when I saw Carmel’s bedroom I was swooning! This little “Mom’s nook” really had me:

mom cave nook

So lovely! That chair is gorgeous!

Vel had a big wall behind her bed to contend with, so she used painters tape and some paint to create some interest:

graphic rug gray white

This gives me an idea for the big wall in our bedroom! I’ve been trying to figure out a way to make it less BIG and more cozy.

Kelly’s bedroom is so serene and pretty and I loved her DIY touches:

pallet art

The painted furniture, the pallet art – it’s all so well done! The window above the bed is so pretty too.

The stenciled wall in Kate’s room makes a beautiful statement:

damask stencil wall

Love how the bedding works with the wall too.

I was digging Joanne’s more contemporary bedroom as well:

contemporary bedroom

The ornate mirror combined with the simple lines of the nightstand – beautifully done! I REALLY like the graphic black and white pillows too.

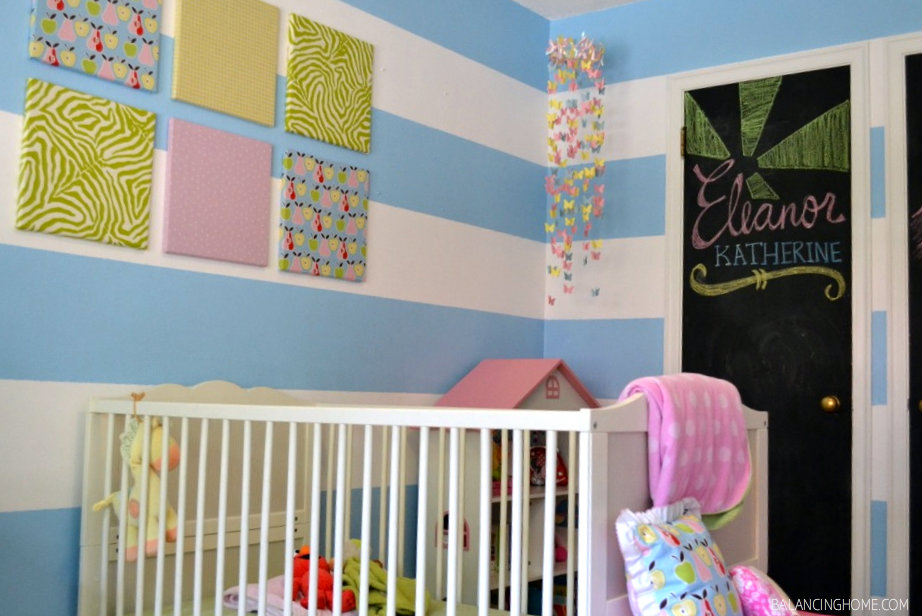
And finally, I love color in a kid’s room and this nursery over at Megan’s had me smiling big time:

butterfly mobile pink blue nursery

So sweet, so vibrant, but not over the top. The chalkboard is fun too!

Well, again, you all did not disappoint! I’m so thrilled that you all share your talents with us every month. If you missed this party, you can see 200+ rooms linked up here.

Have a GREAT weekend! Can you believe how close we are to November??

Thursday, October 25, 2012

Paper Halloween

Hey hey! Hope you are having a great week! I’m dragging today – between a late night car break down and a cold that came on super fast last night, I’m in a bit of a fog today. I apologize for any misspellings in this post ahead of time. :)

When it comes to Halloween decorating, I’m all about quick, easy and stuff that doesn’t take up valuable storage space. We put up most of our Halloween decor outside, and I don’t do a ton inside just because I always go through the fall/Halloween dilemma. Put up fall, take it down, do Halloween, put it back up after? Or put up fall, add some Halloween in here and there? The older I get the more I go for the latter. ;) Over the past few years I’ve come up with a solution that meets all of those criteria – the easy to store and cheap part especially. I love experimenting with different ways to use them too.

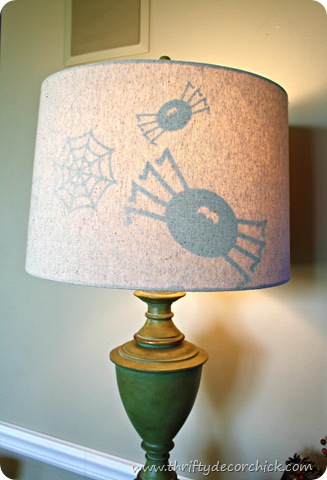
I’ve shown you a few of these ideas before – one of my favorites is using our lamp shades. What looks like this during the day:

wooden box fall decor

Has a little surprise at night:

Halloween paper cut outs on lamp shade

I just cut out the shapes years ago with my vinyl cutter – they have kept fine over the years. (I use a little bit of spray adhesive or just tape to put them on the inside of the shade.)

On most of our lamp shades you can’t see them unless you turn on the light, but some are lighter so you see them during the day too. I just think it’s such a fun little Halloween surprise:

Halloween paper cut outs on lamp shade

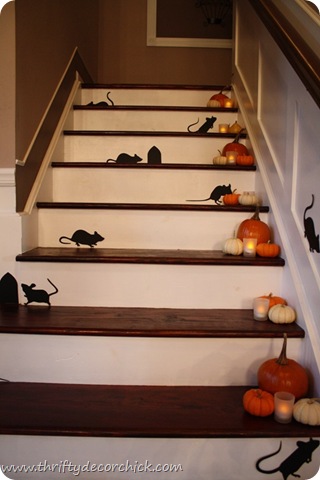
Of course our infamous Martha Stewart mice usually go on the stairs:

mice cut outs on stairs

We put them up this year too, but when I finished this next project I realized it was a bit much, so I took some down. I have a new spot in mind, we’ll see if I have time to pull that off before Halloween. ;)

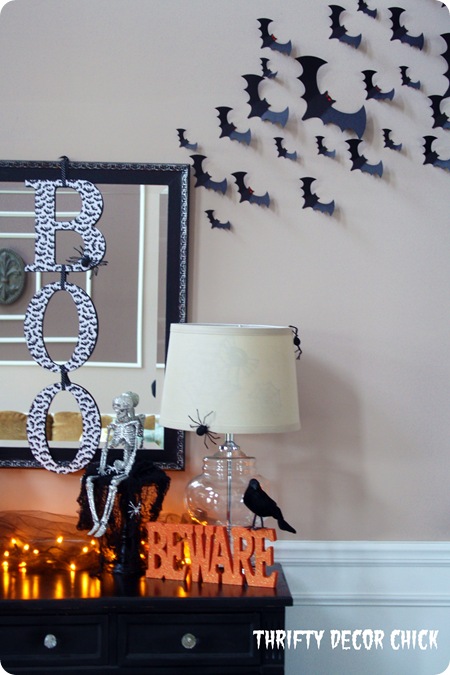
Last year I showed you how I added a gaggle of bats on the wall:

paper bats on wall

Is it a group of bats a gaggle? Who knows. Sure. I’m tired people. ;)

Well, back then our walls were that pinkish hue and the paint was a flat sheen – so when I took down all of those bats the sticky stuff I used to hang them left a billion little dots on the wall. Niiiiiice.

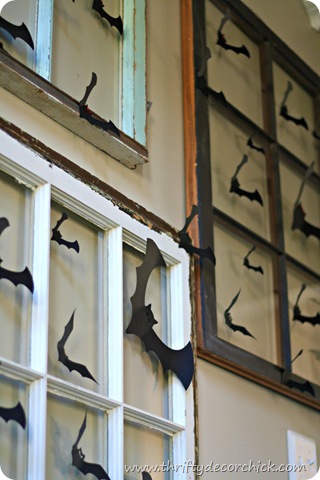
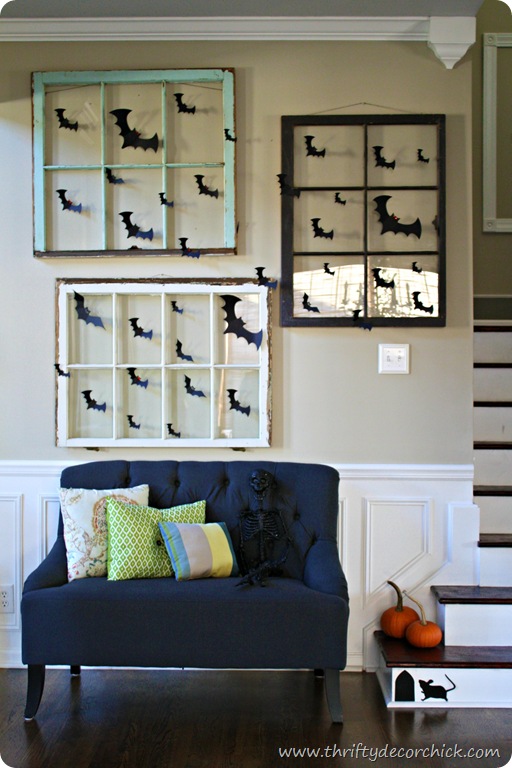
The walls are eggshell now, so we probably won’t have that problem again, but I wasn’t taking any chances. This time I added them to the old windows I have hanging near the staircase instead and I LOVE how they look!

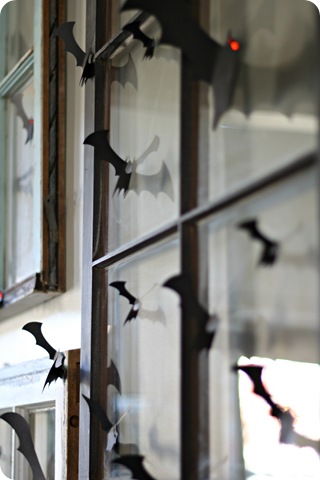
I just used that sticky gummy stuff again to put them right on the windows:

paper bats on wall Halloween

I bent up their wings to give them some dimension:

paper bats on wall Halloween

Last year I added some eyes to a few of them:

paper bats on wall Halloween

So fun!

They make a impact but didn’t cost much – well really anything:

paper bats on wall for Halloween

I wanted to add more but tried to show some restraint.

I was planning on making some quick Halloweeny pillows for the settee but then the monster cold hit me last night and that wasn’t happening. Maybe I’ll get some whipped up this weekend. Or maybe I’ll just sleep. :)

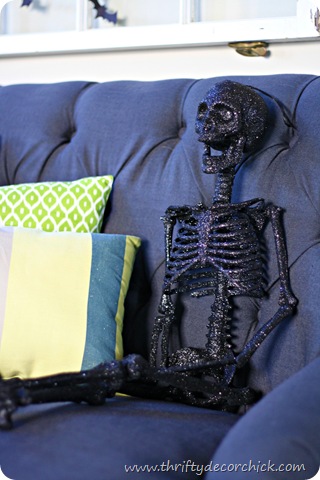
Our skeleton friend hangs out to greet our visitors:

sparkly skeleton

He’s just chillin’. Feet crossed. He should really close that mouth though. So rude. :)

He doesn't show up great so I may spray him with some sparkly silver spray paint to brighten him up a bit.

I love using paper for Halloween decorations – it’s cheap and takes up hardly any storage space – you can’t beat it! If you have a Silhouette or similar vinyl cutting machine it takes no time at all to create these. If you don’t, you can usually find them at craft stores and I found a TON of different options at the Dollar Tree last fall and this fall.

There are also printable options online – I found a great resource here with a bunch of Halloween images you can print and cut out on your own.

What’s your go-to Halloween decor? Does your family get into the really spooky stuff or does it stay cute and lighthearted?